Running your store on WeedUs
Everything a retail store needs, in the order you'll need it: create your account, subscribe, browse vendor catalogs, send orders, receive deliveries, keep your POSaBIT inventory in sync, and host vendor days.
1.Create your account
Signing up takes about two minutes. You'll need your store's basic details and your Washington retail license number.
- 1Go to weedus.app/auth/register.
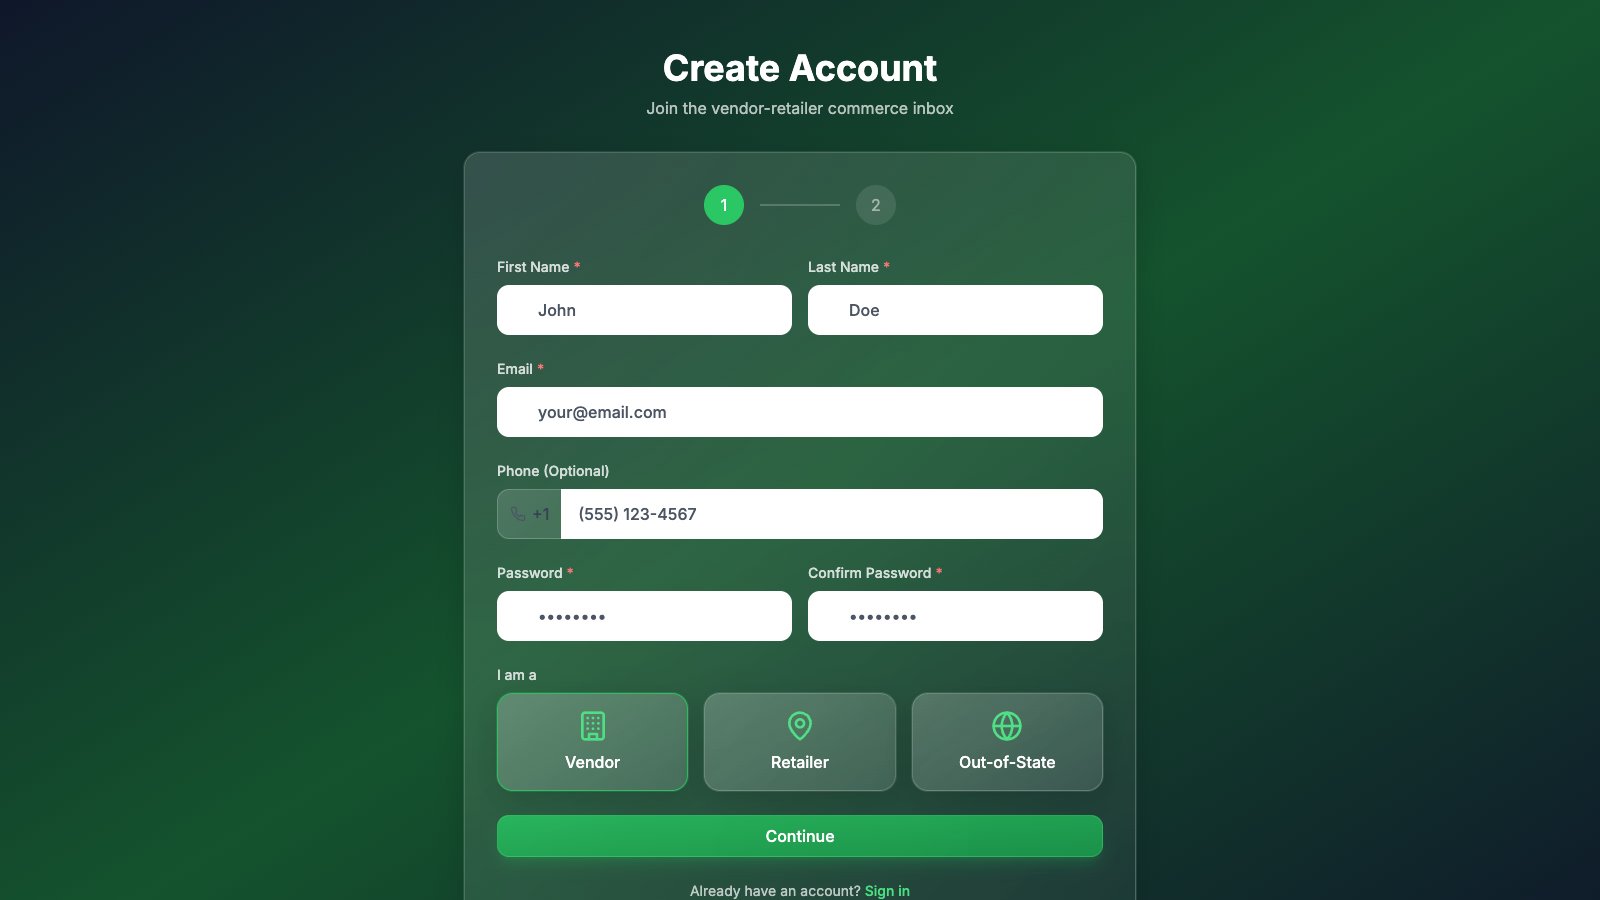
- 2Fill in your name, email, and a password, then choose the Retailer card.
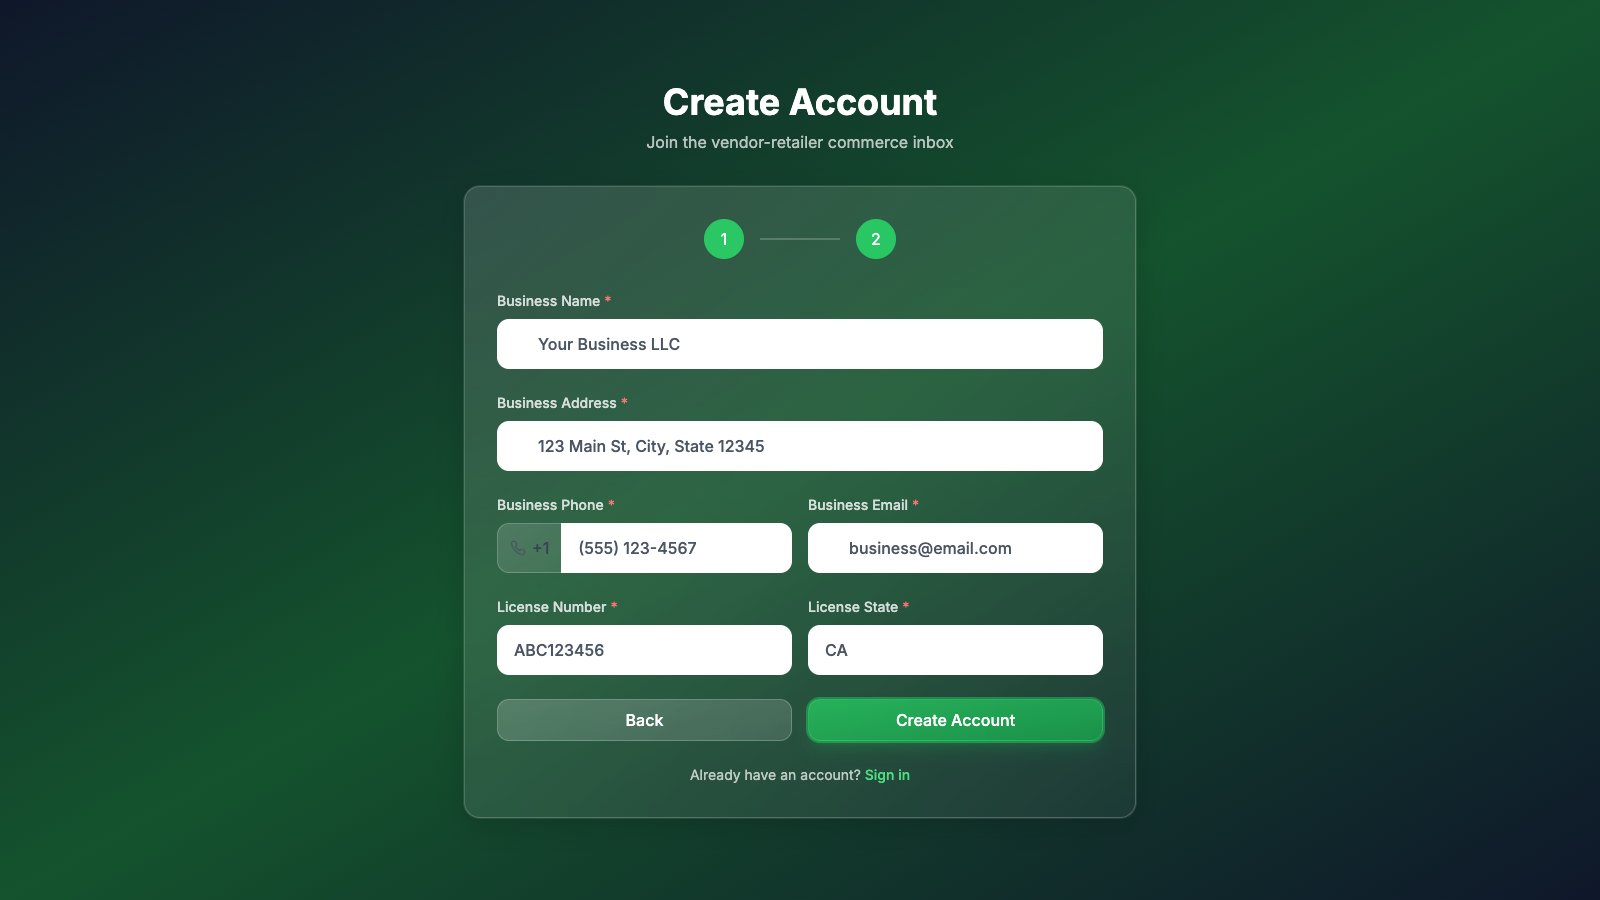
- 3Press Continue and enter your store details: business name, address, phone, business email, and your WA retail license number.
- 4Press Create Account. We'll send a verification link to your email — open it and click the link.
- 5After verifying, you can sign in right away. Your account starts with limited access while our team reviews it; you can already pick a plan (next section). Once approved, everything unlocks.
Didn't get the email? Check spam, then try signing in — the app will offer to resend the verification link.
2.Subscribe
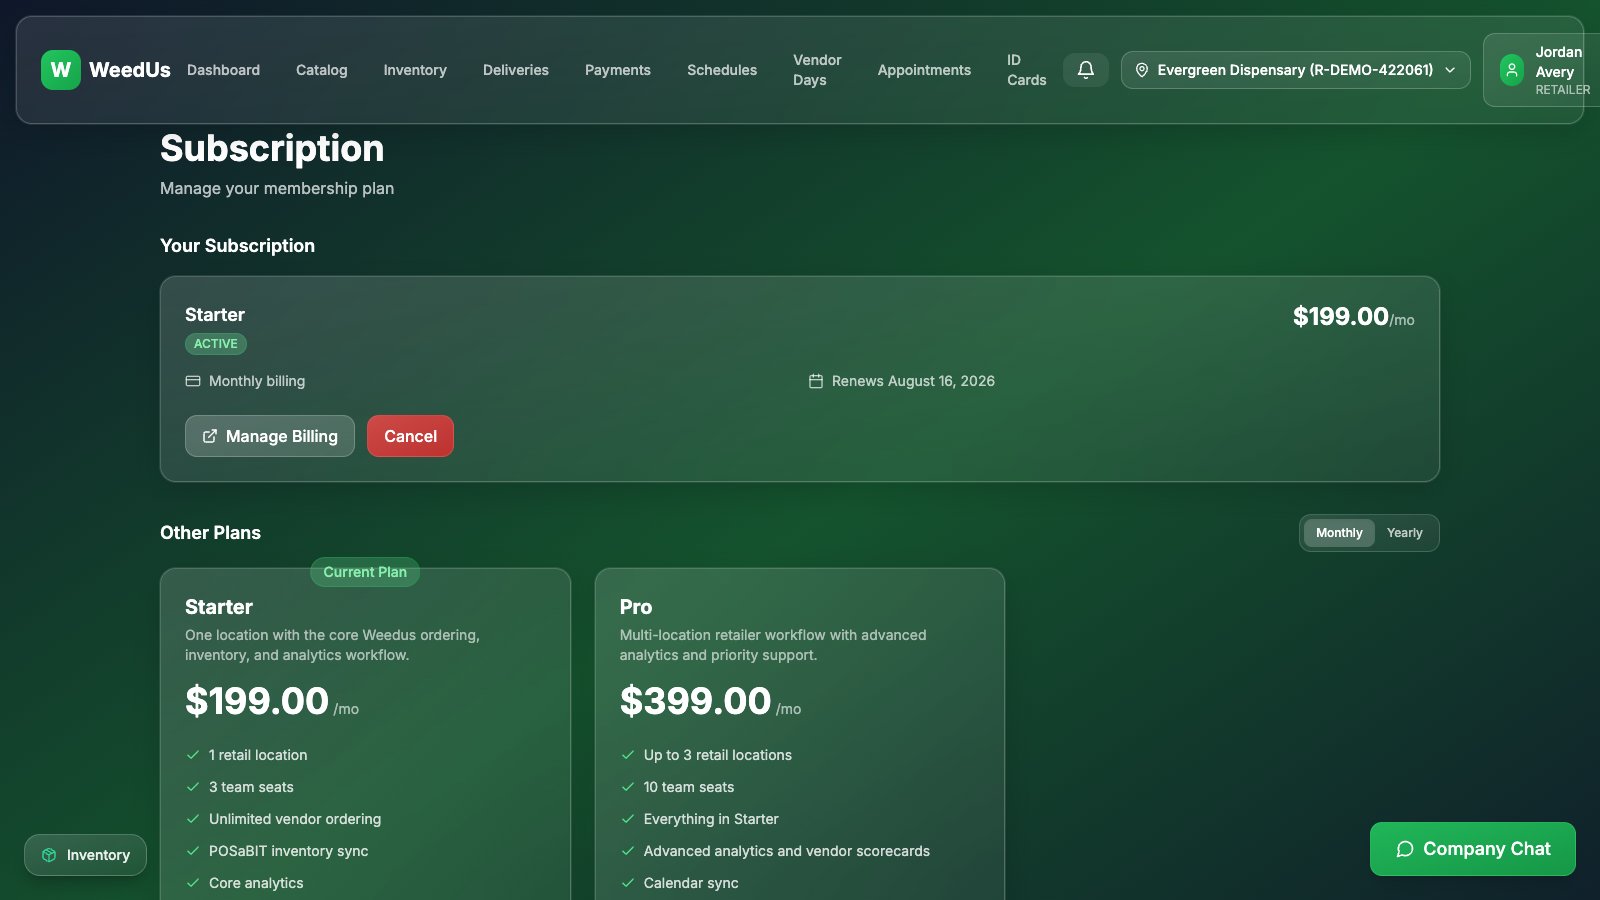
WeedUs for retailers is a monthly subscription. You can pick a plan right after signing up, or later from the Subscription page (under your profile menu).
| Plan | Price | Best for |
|---|---|---|
| Starter | $199/month | One location, up to 3 team seats, ordering + POSaBIT sync + core analytics. |
| Pro | $399/month | Up to 3 locations, 10 seats, advanced analytics, calendar sync, priority support. |
- 1Open the Subscription page and pick Monthly or Yearly billing. (Yearly saves money and waives the one-time $99 setup fee.)
- 2Press Subscribe on your plan. You'll be taken to a secure Stripe checkout page to enter your card — WeedUs never sees your card details.
- 3After paying you'll return to WeedUs and finish a short onboarding: confirm your business info and license, then submit for review.
WeedUs Analytics is a separate add-on service at analytics.weedus.app with its own plans (Free, Starter $99, Pro $299, Enterprise $799 per month). The Free tier works immediately with your WeedUs login — paid tiers check out through the same secure Stripe flow and bill to your store organization.
3.Your dashboard
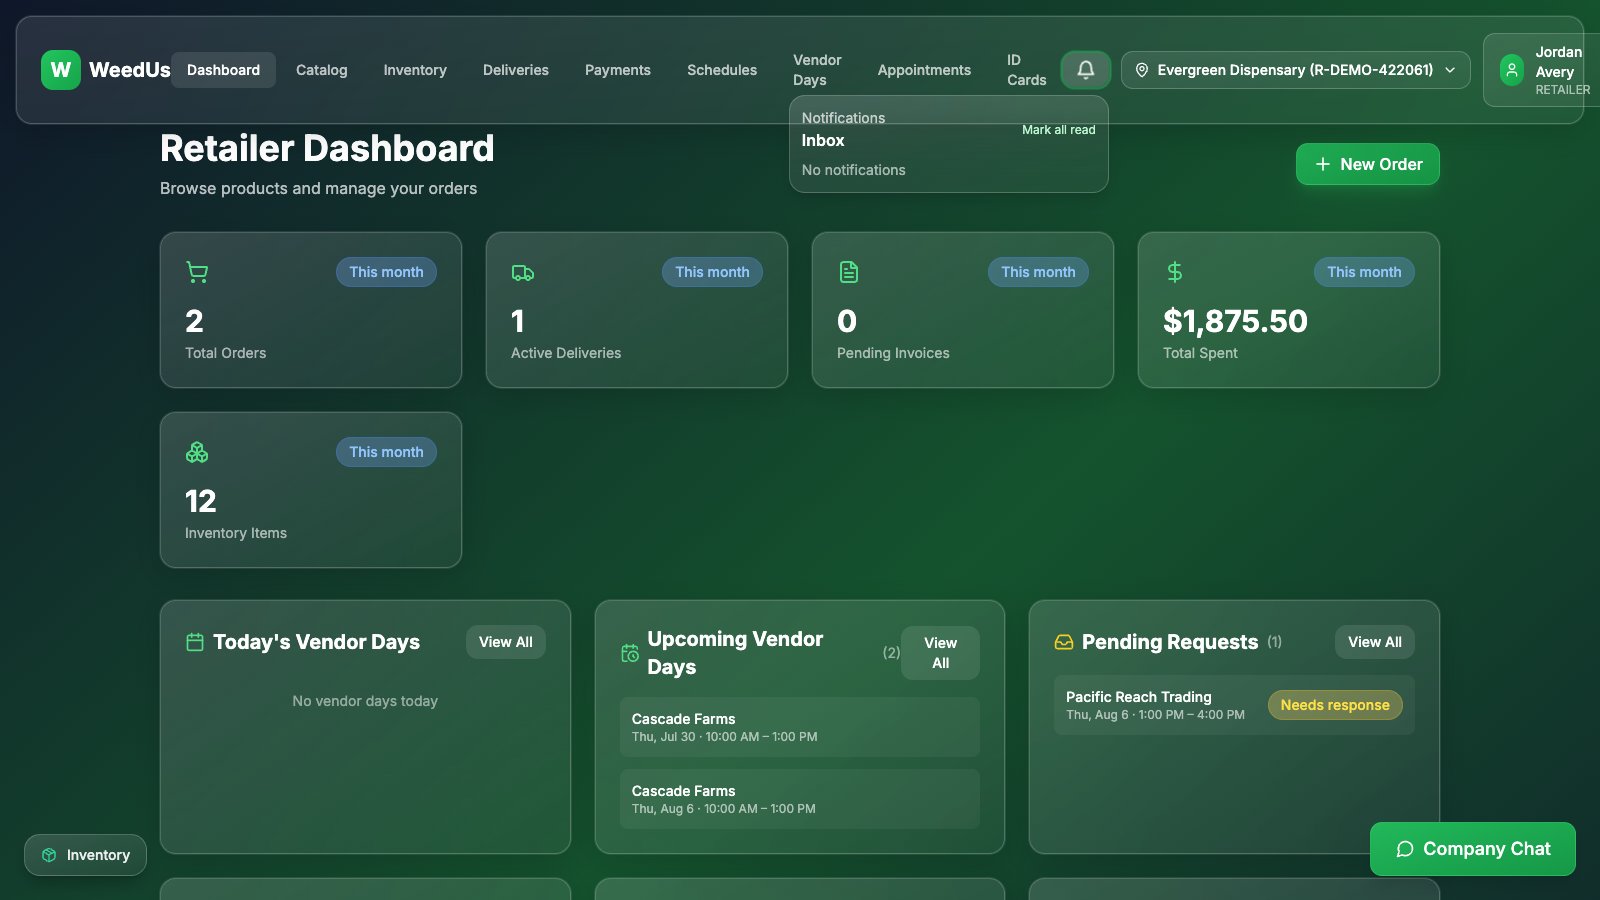
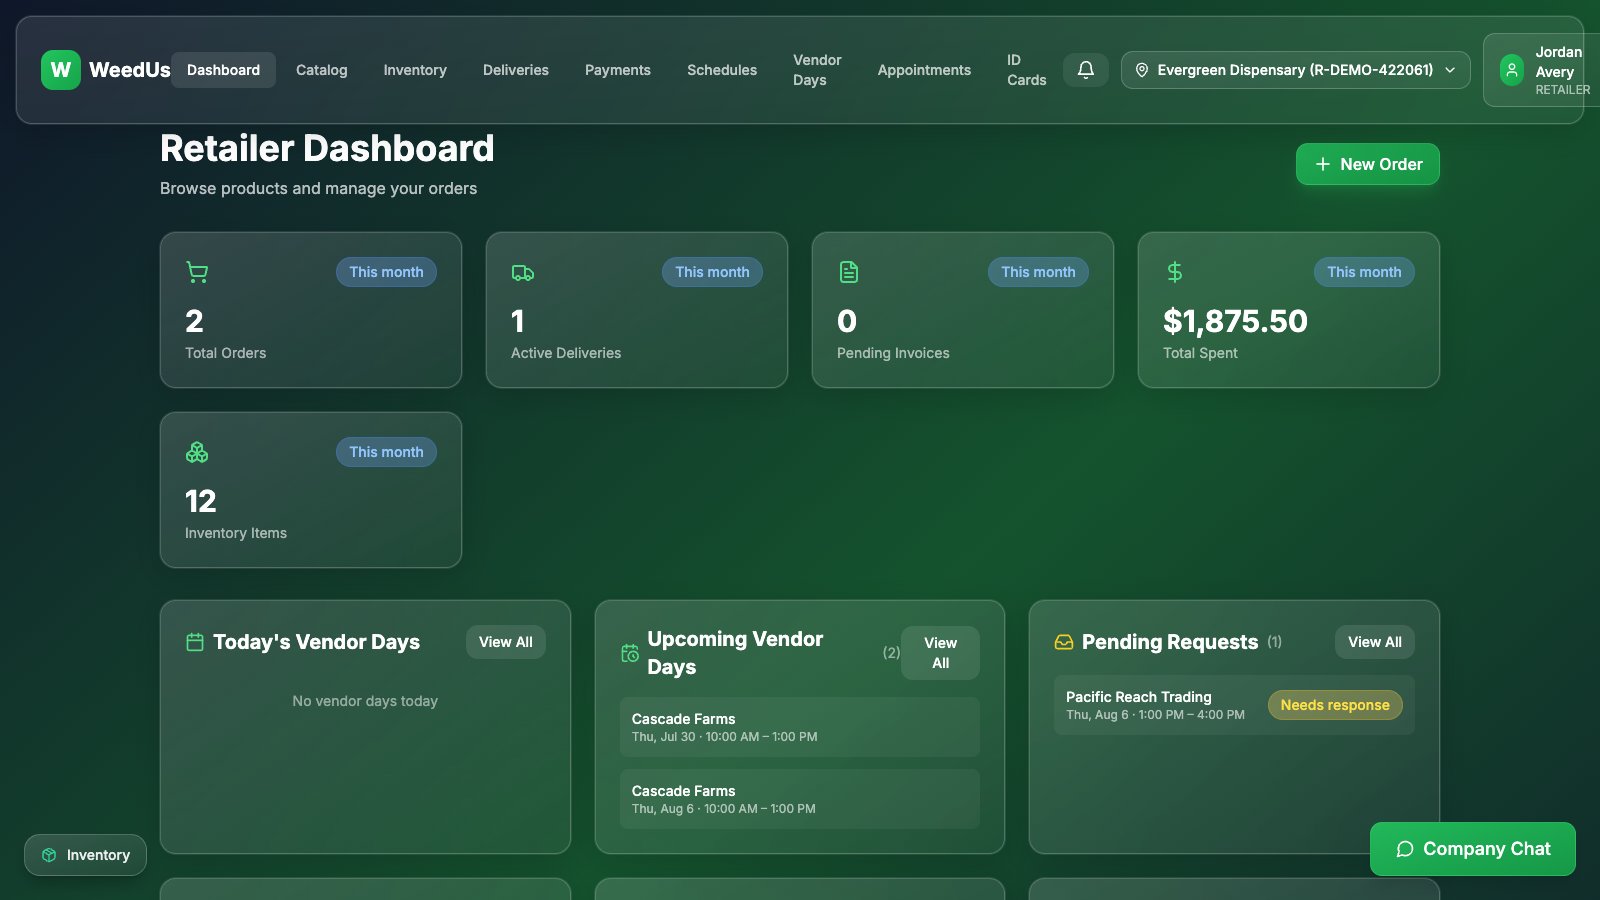
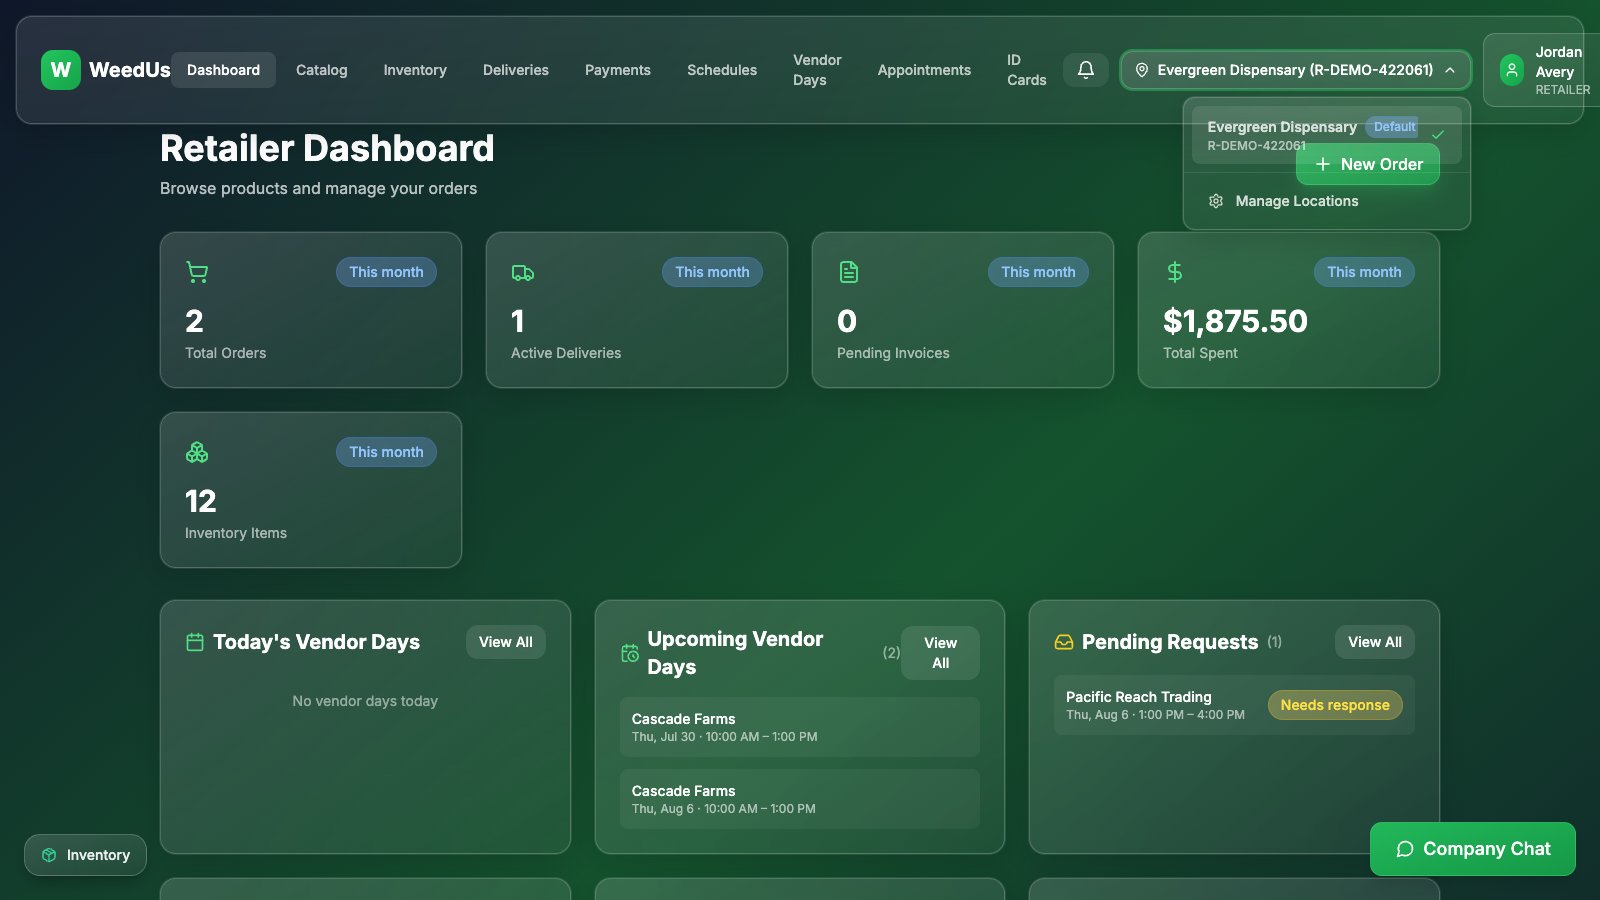
After signing in you land on the dashboard — your day at a glance: monthly order and spend totals, active deliveries, today's and upcoming vendor days, and requests that need a response. The New Order button jumps straight into the catalog.
4.Browse the catalog
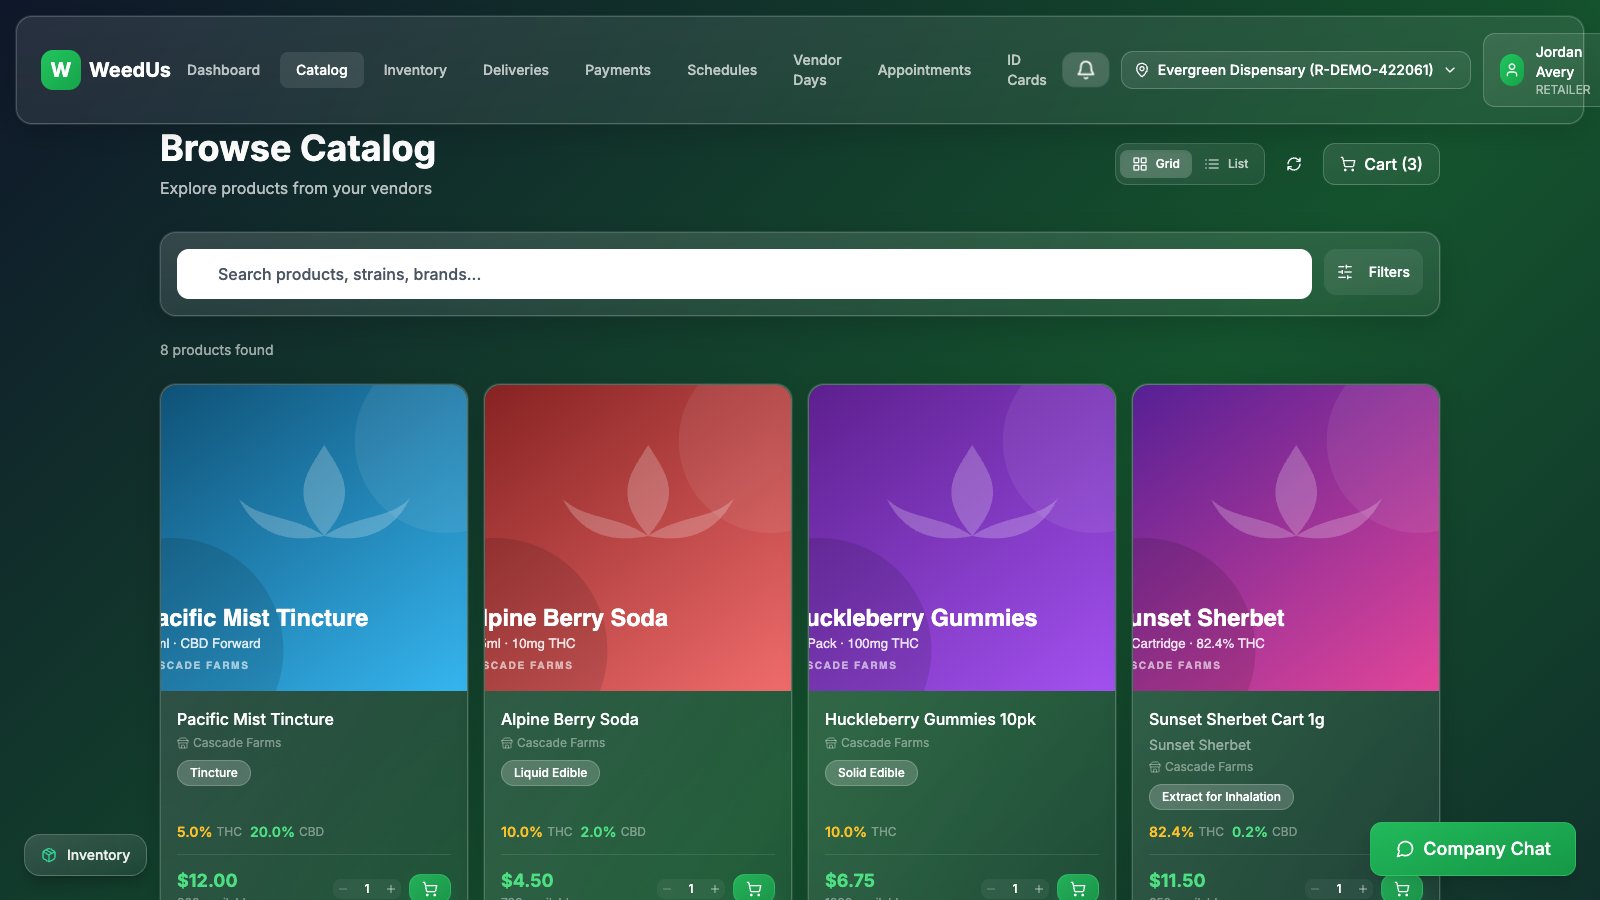
The Catalog page shows every product your vendors have published — with photos, potency, and wholesale prices.
- 1Open Catalog in the top menu.
- 2Use the search box for names, strains, or brands, or press Filters to narrow by vendor, category, product type, THC/CBD range, price range, lab status, or in-stock only.
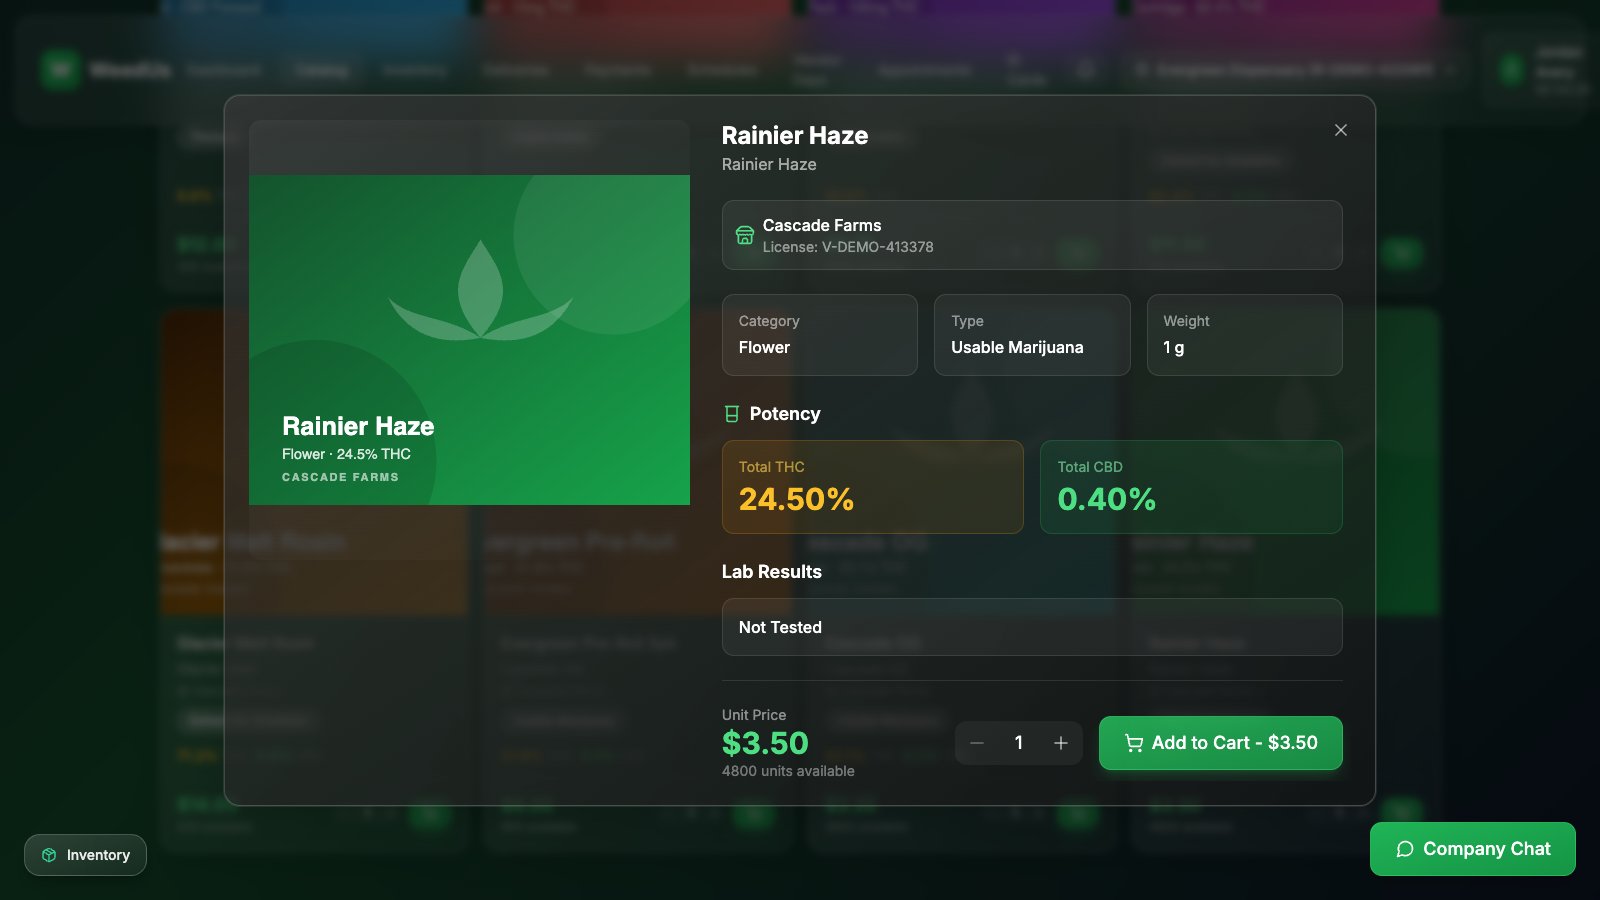
- 3Click any product to see full details — potency numbers, unit size, available quantity, and photos.
- 4Set a quantity and press Add to Cart. Keep browsing — the cart collects items from as many vendors as you like.
5.Cart & sending orders
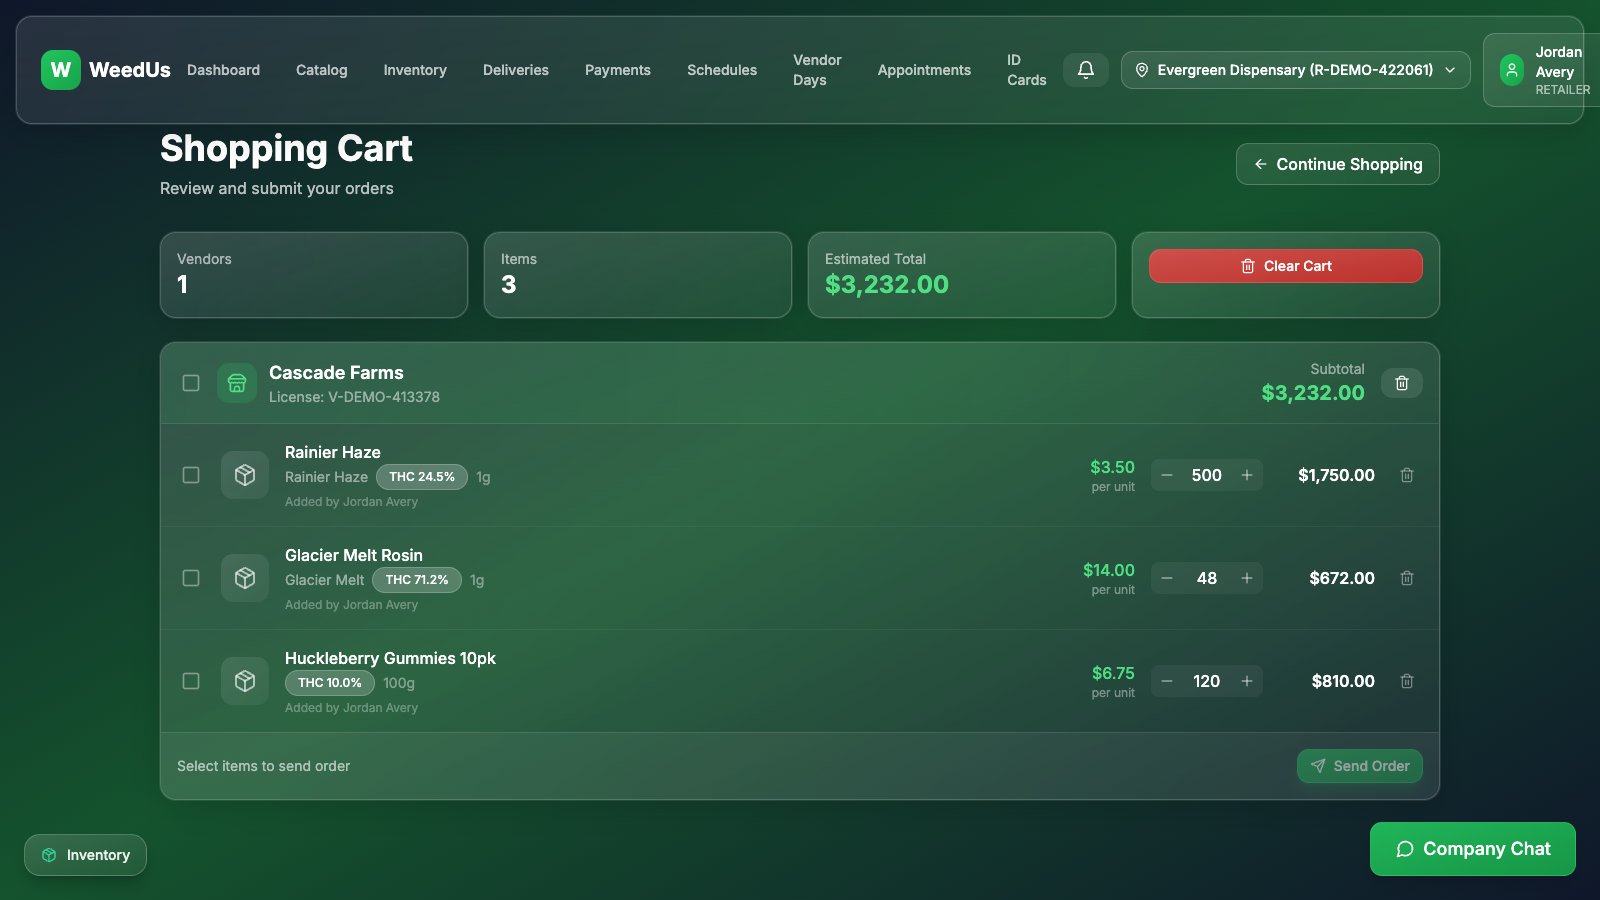
Your cart groups items by vendor, because each vendor receives their own order. Think of it as writing one purchase request per supplier.
- 1Open Cart (the cart icon in the top bar). Adjust quantities with the +/− controls, or remove items with the trash icon.
- 2Tick the checkbox next to the items you want to order now (the checkbox next to the vendor's name selects everything from that vendor).
- 3Press Send Order on that vendor's group.
- 4Add an optional note (delivery preferences, questions) and confirm. The vendor gets notified immediately and will respond — watch the Orders page and your notification bell.
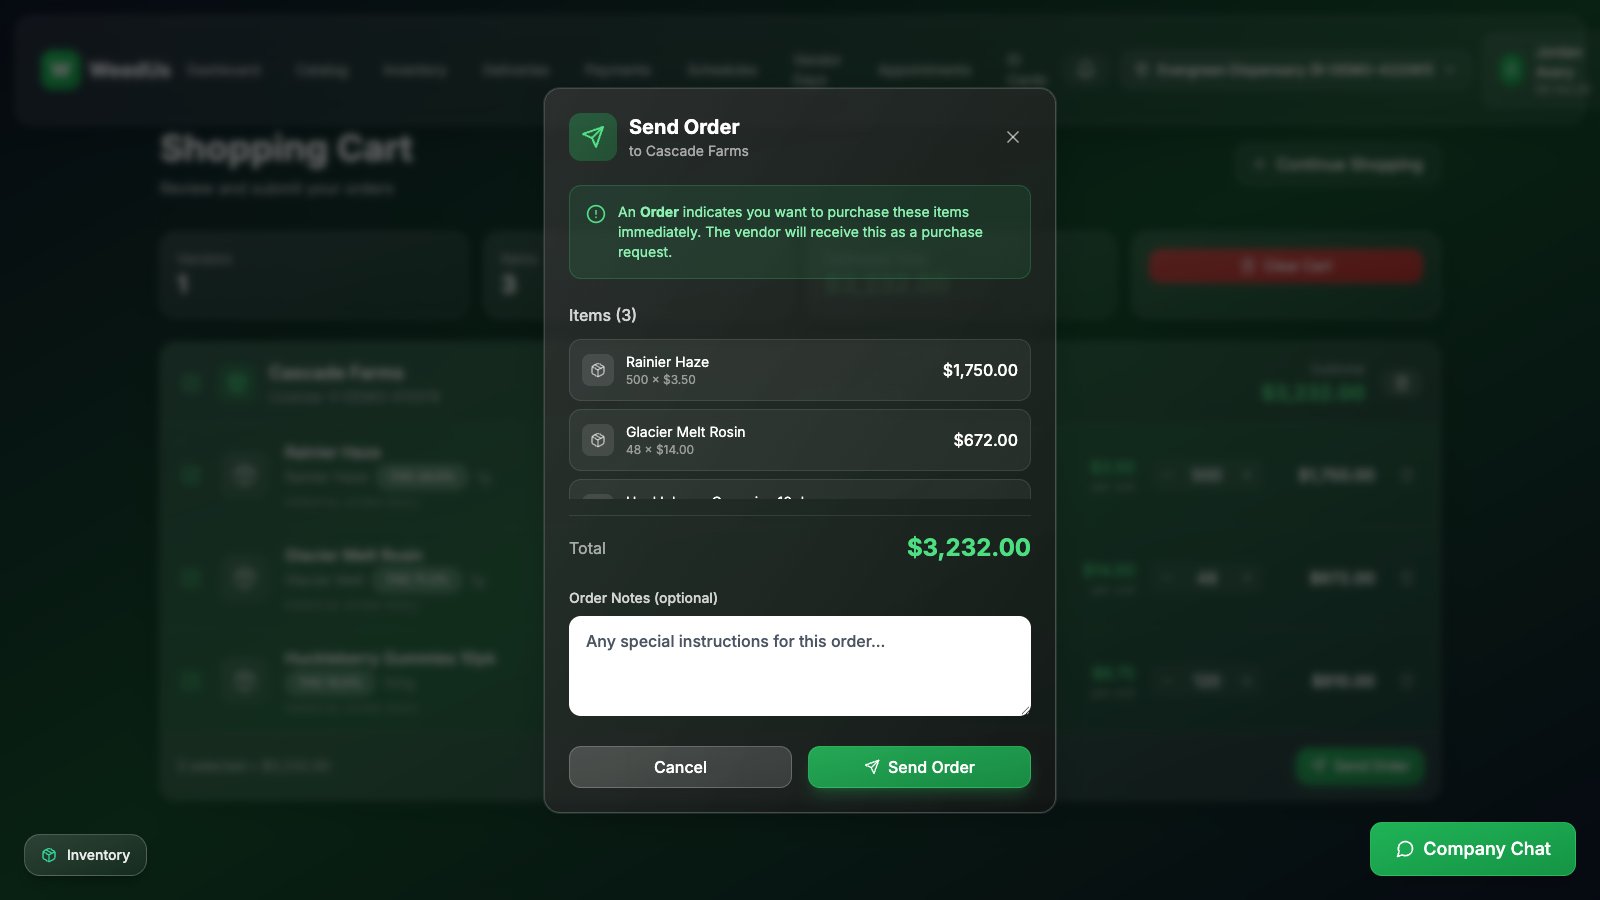
Team members with the Bartender role see the cart in read-only mode — only Owners and Managers can send orders.
6.Tracking orders
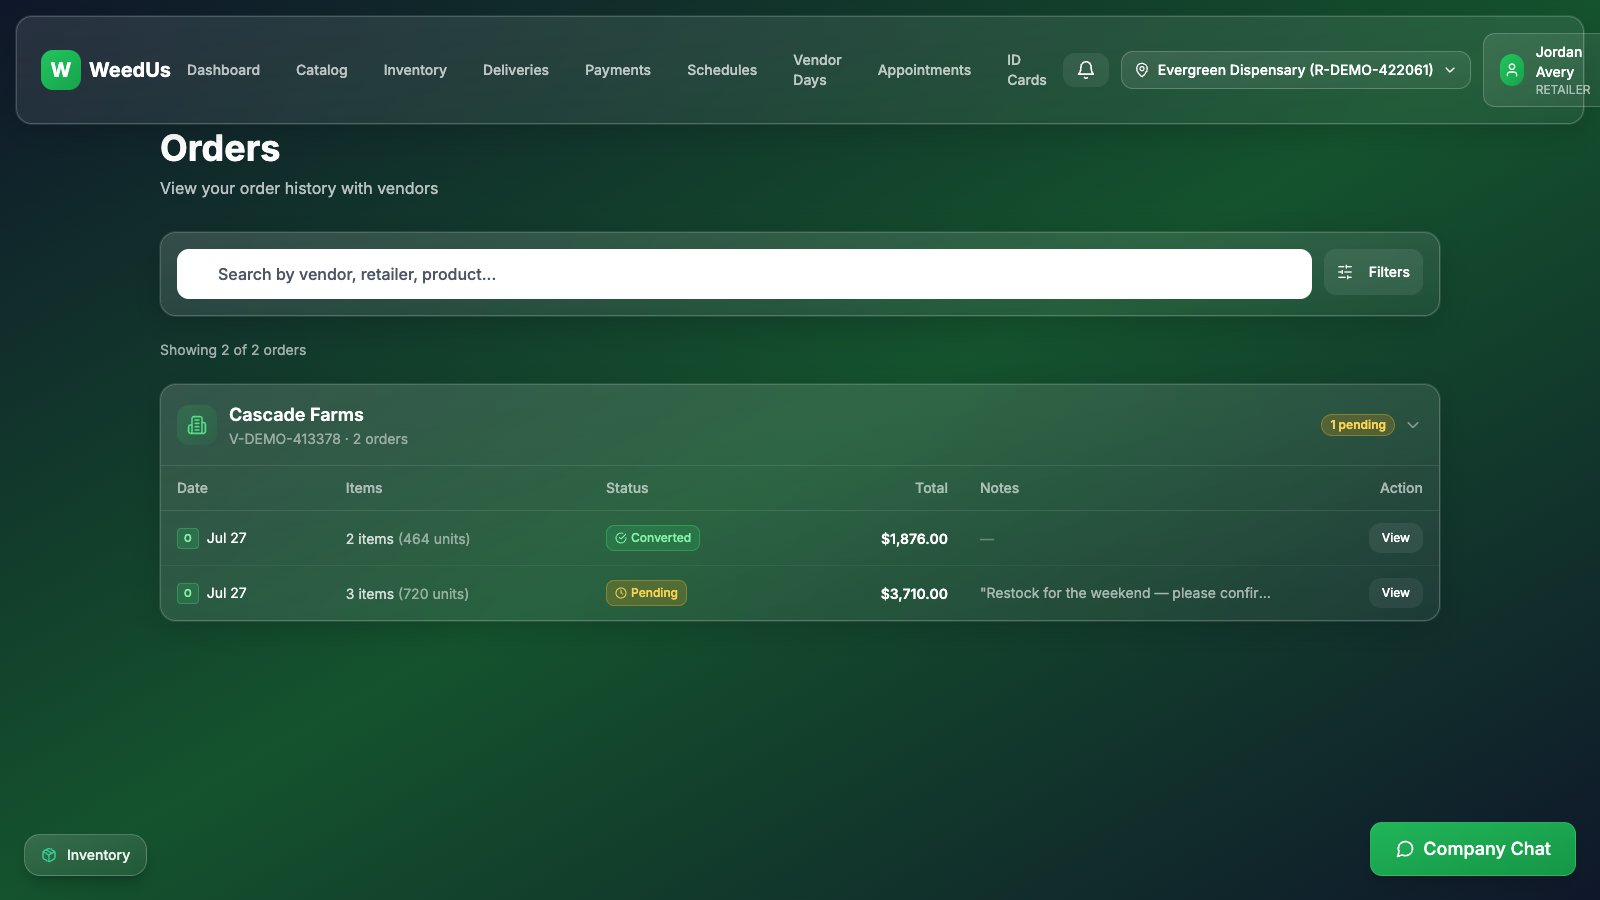
The Orders page lists every order you've sent, with its current status:
- Pending — sent, the vendor hasn't opened it yet.
- Viewed — the vendor has seen it.
- Responded — the vendor replied (check the order for their message).
- Converted — the vendor turned it into a scheduled delivery. You'll find the delivery on the Deliveries page.
- Cancelled — the order was withdrawn or declined.
Click any order to see its items, prices, and history.
7.Inventory & POSaBIT
Connect your POSaBIT point-of-sale once, and WeedUs keeps a live copy of your store's menu — so you (and your vendors) can see what's on hand without opening POSaBIT.
Connect POSaBIT (one time)
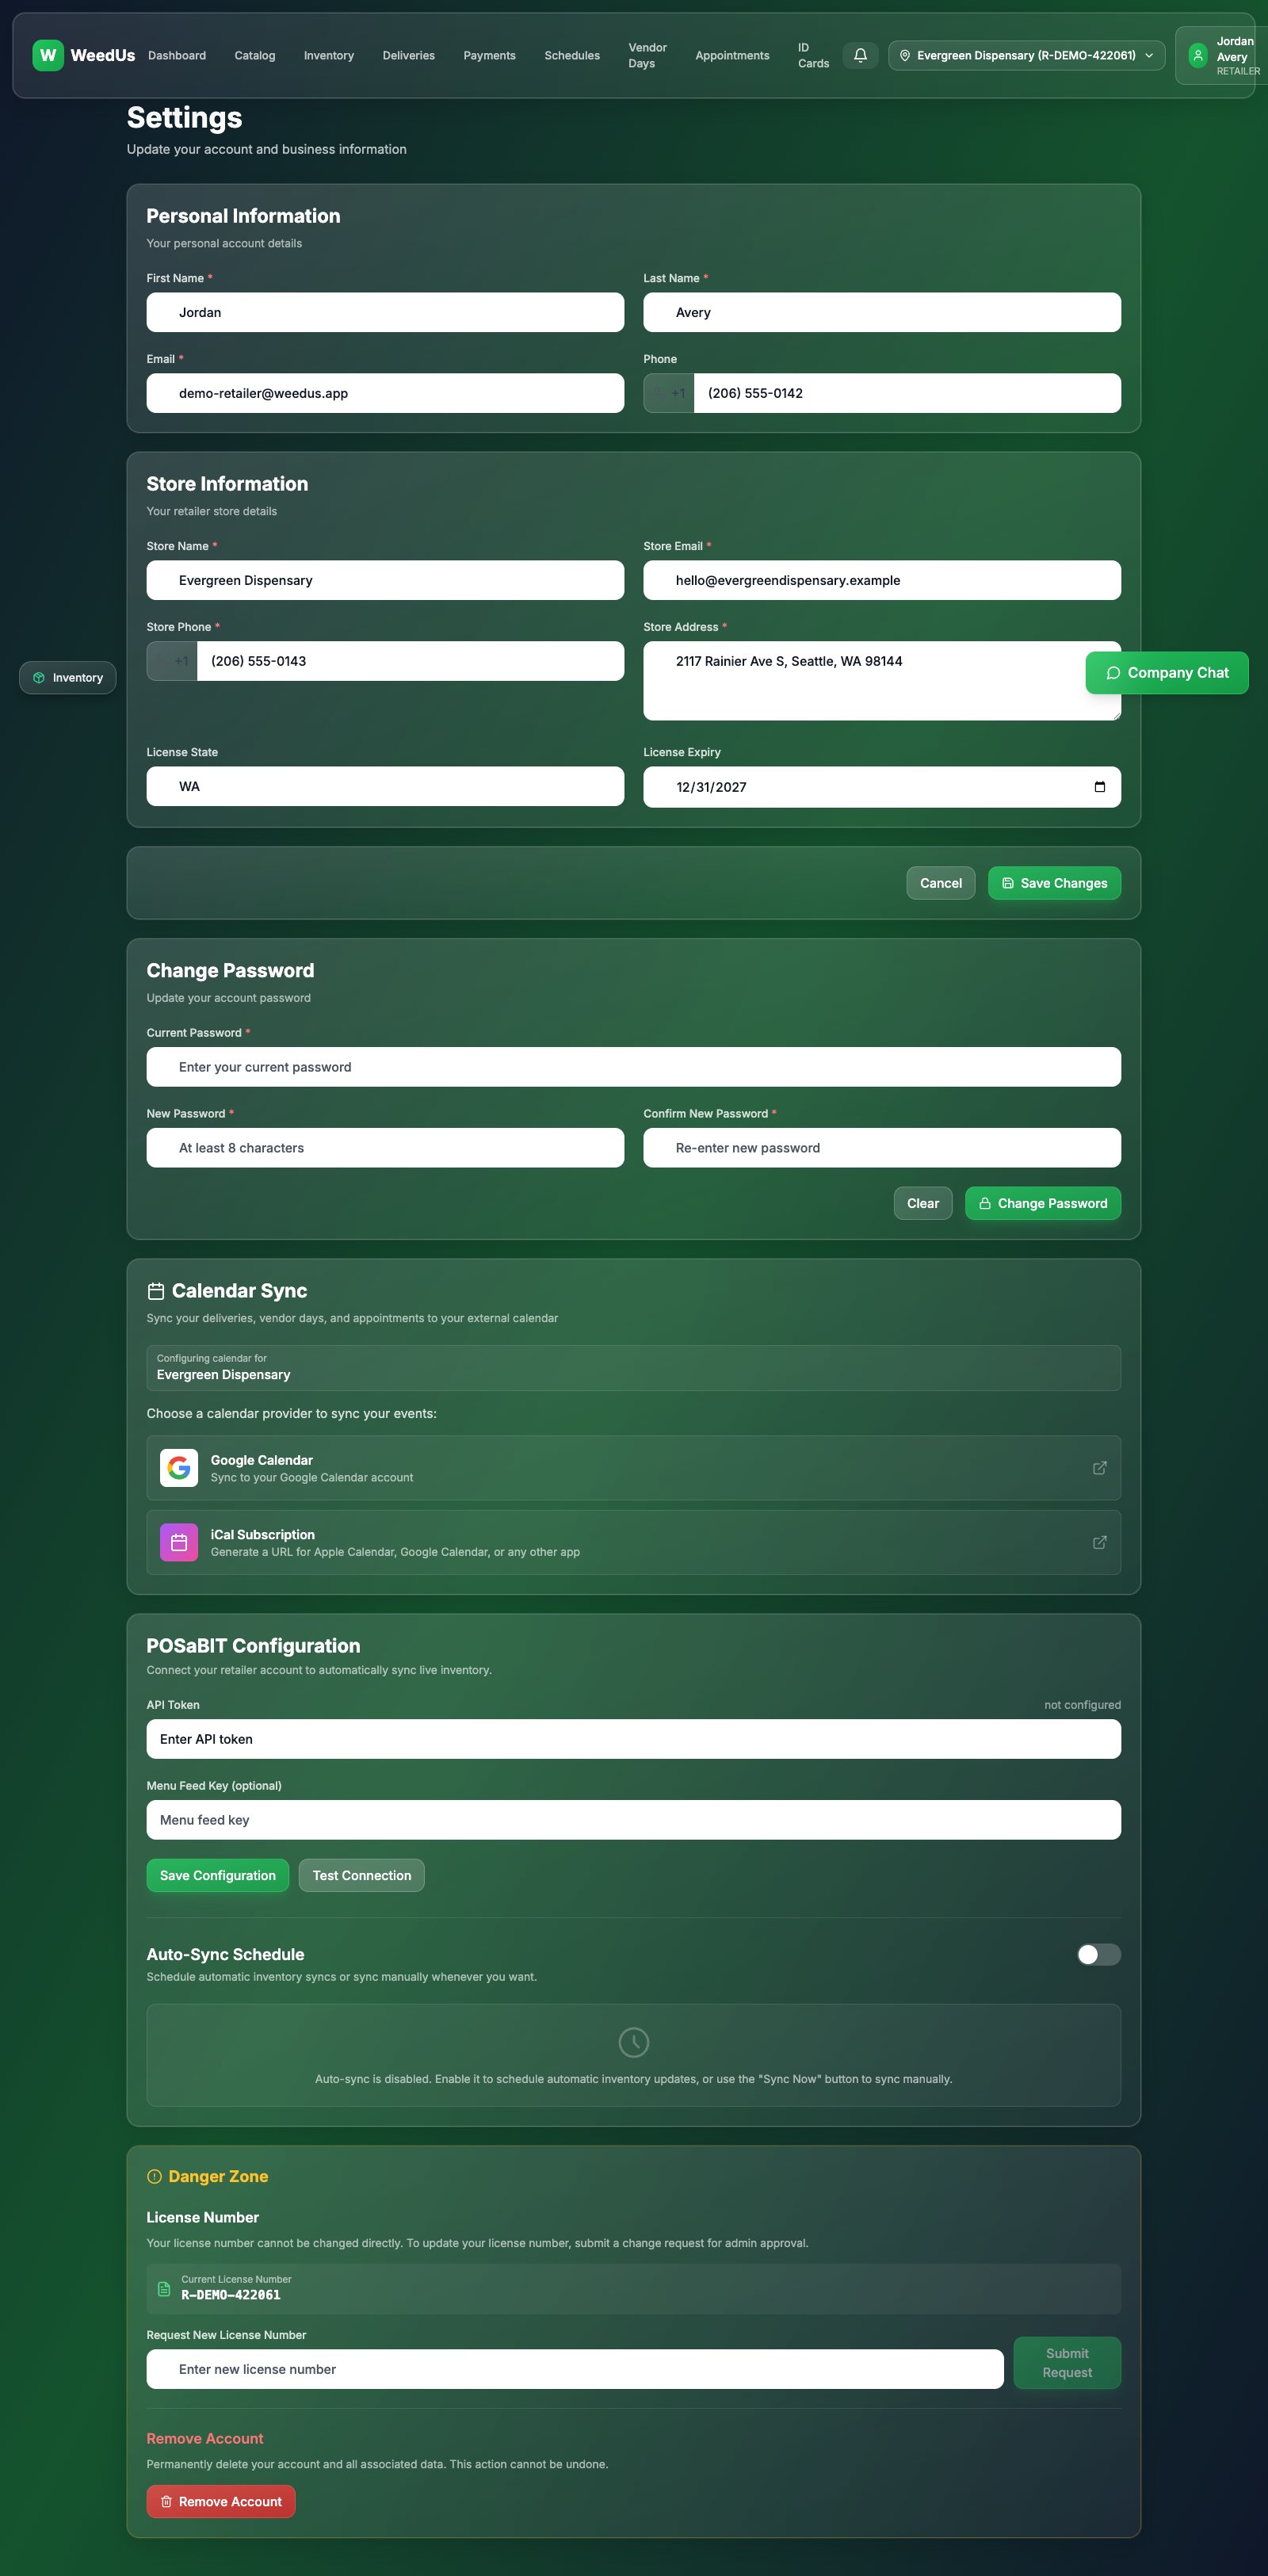
- 1Open Settings from your profile menu and scroll to the POSaBIT section.
- 2Paste your POSaBIT API token and menu feed key. You can copy both from your POSaBIT back office (ask your POSaBIT rep if you can't find them).
- 3Press Test Connection — you should see a green success message.
- 4Choose your daily sync times (for example 06:00) and switch auto-sync on. Save.
Day to day
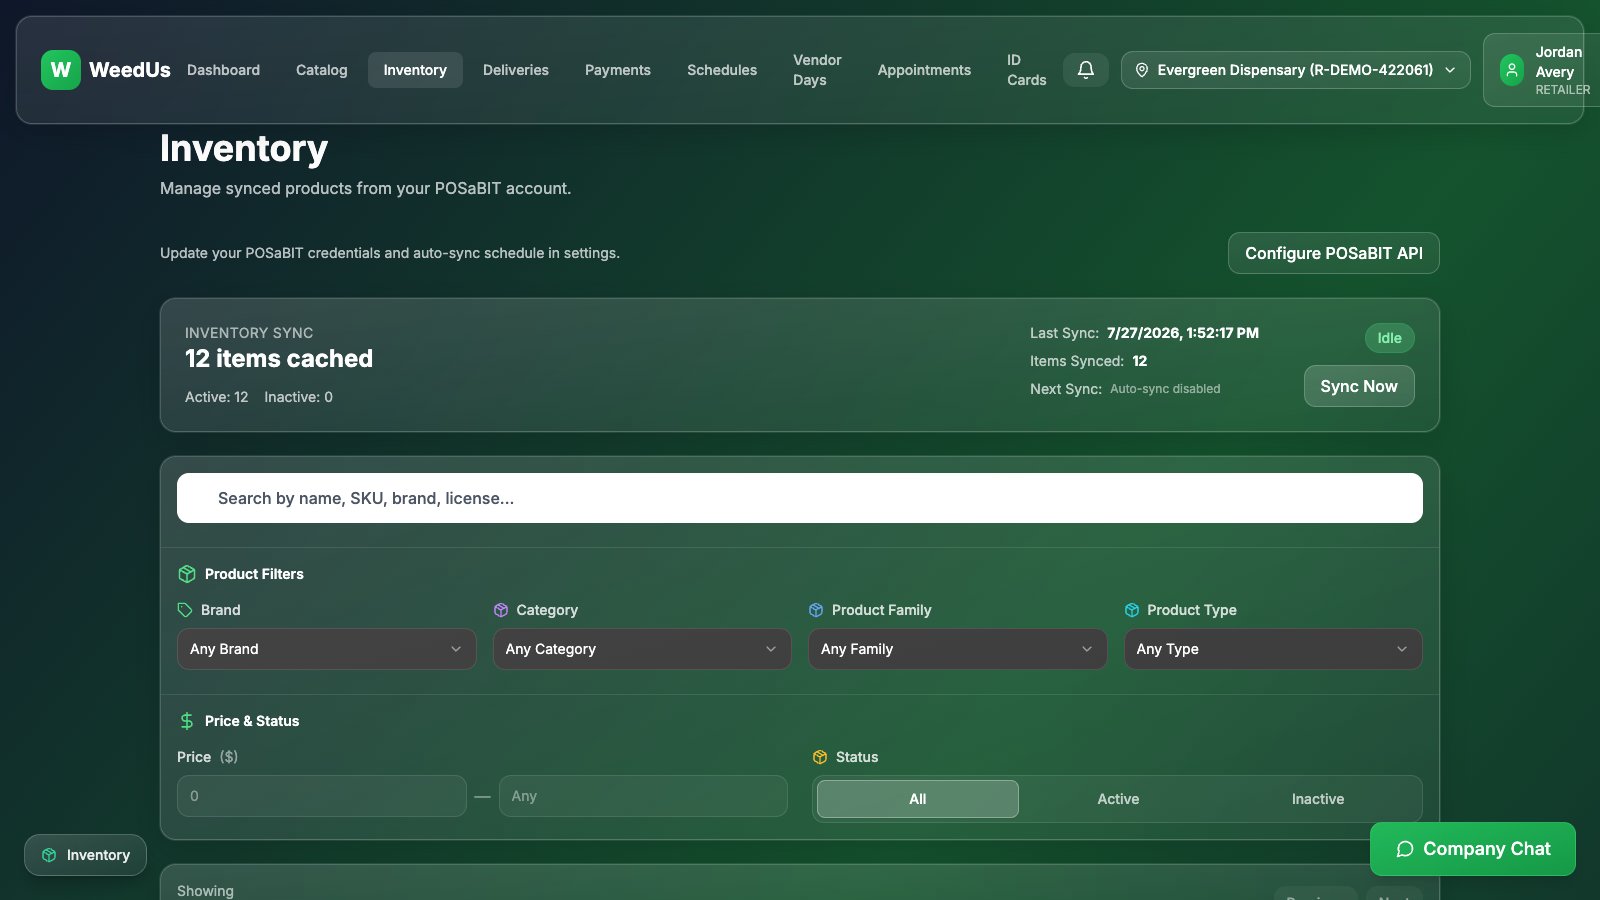
- 1Open Inventory in the top menu to browse your synced menu — search and filter by brand, category, or product type.
- 2The sync status card shows when the last sync ran and when the next one is due. Need it fresh right now? Press the manual Sync button.
- 3Use Download to export your inventory as a spreadsheet.
When you close a delivery (section 10), WeedUs can match the delivered items against this inventory so your stock numbers stay honest.
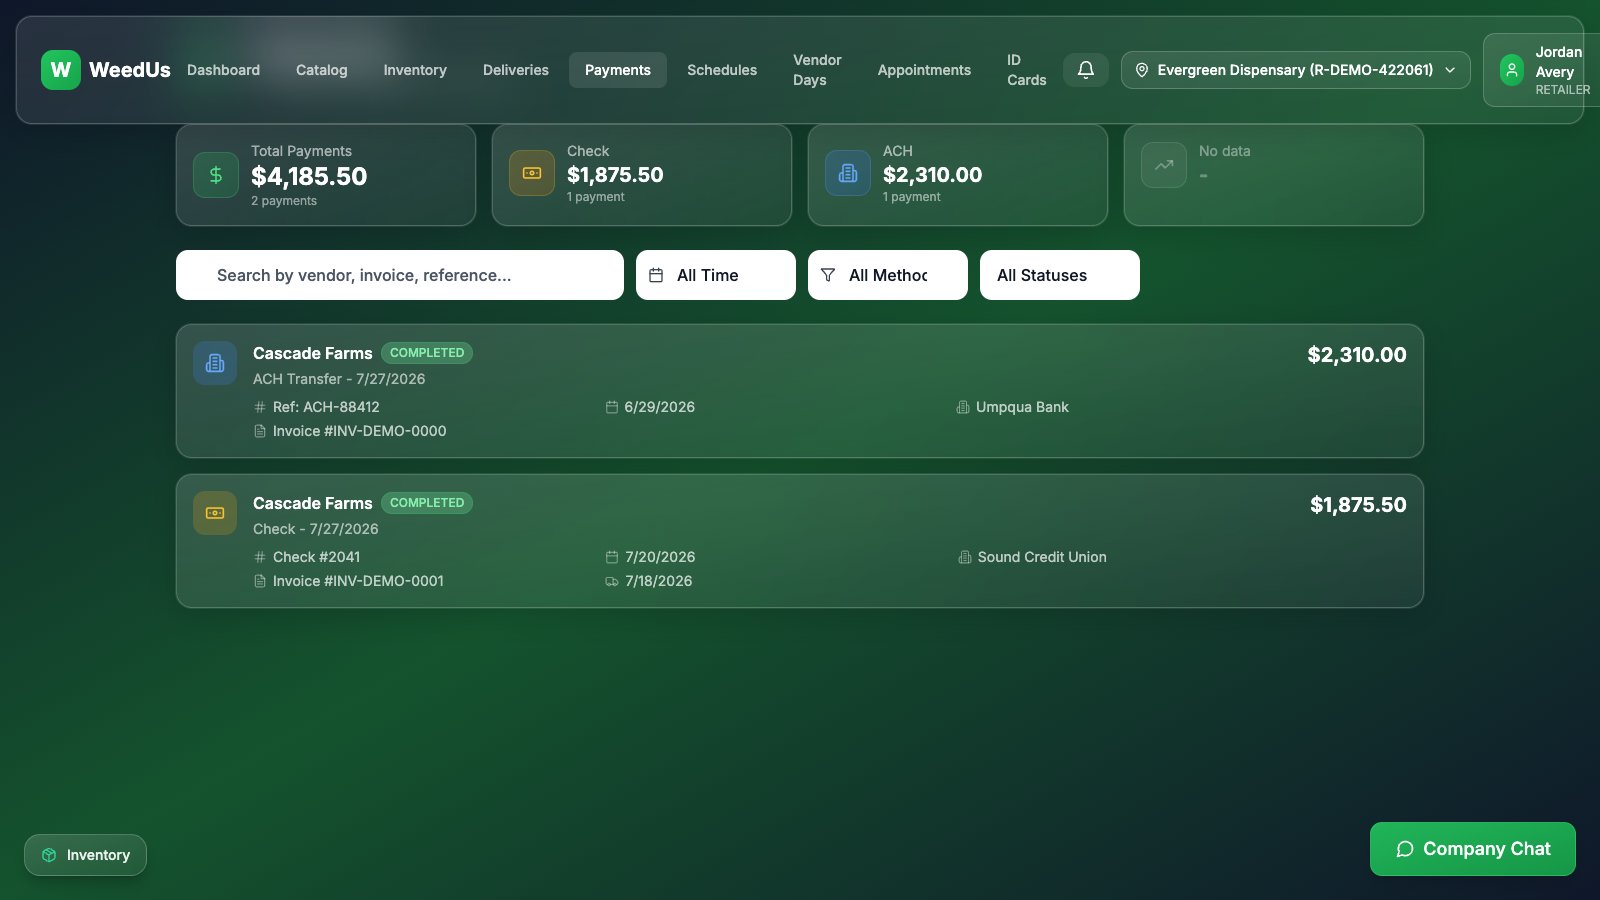
8.Payments
The Payments page is your money trail with vendors: every invoice payment you've recorded — check, ACH, or card — with amounts, dates, and which delivery it belongs to. Recording a payment happens on the delivery itself (section 10); this page is where you look things up later.
9.Schedules — when vendors can come to you
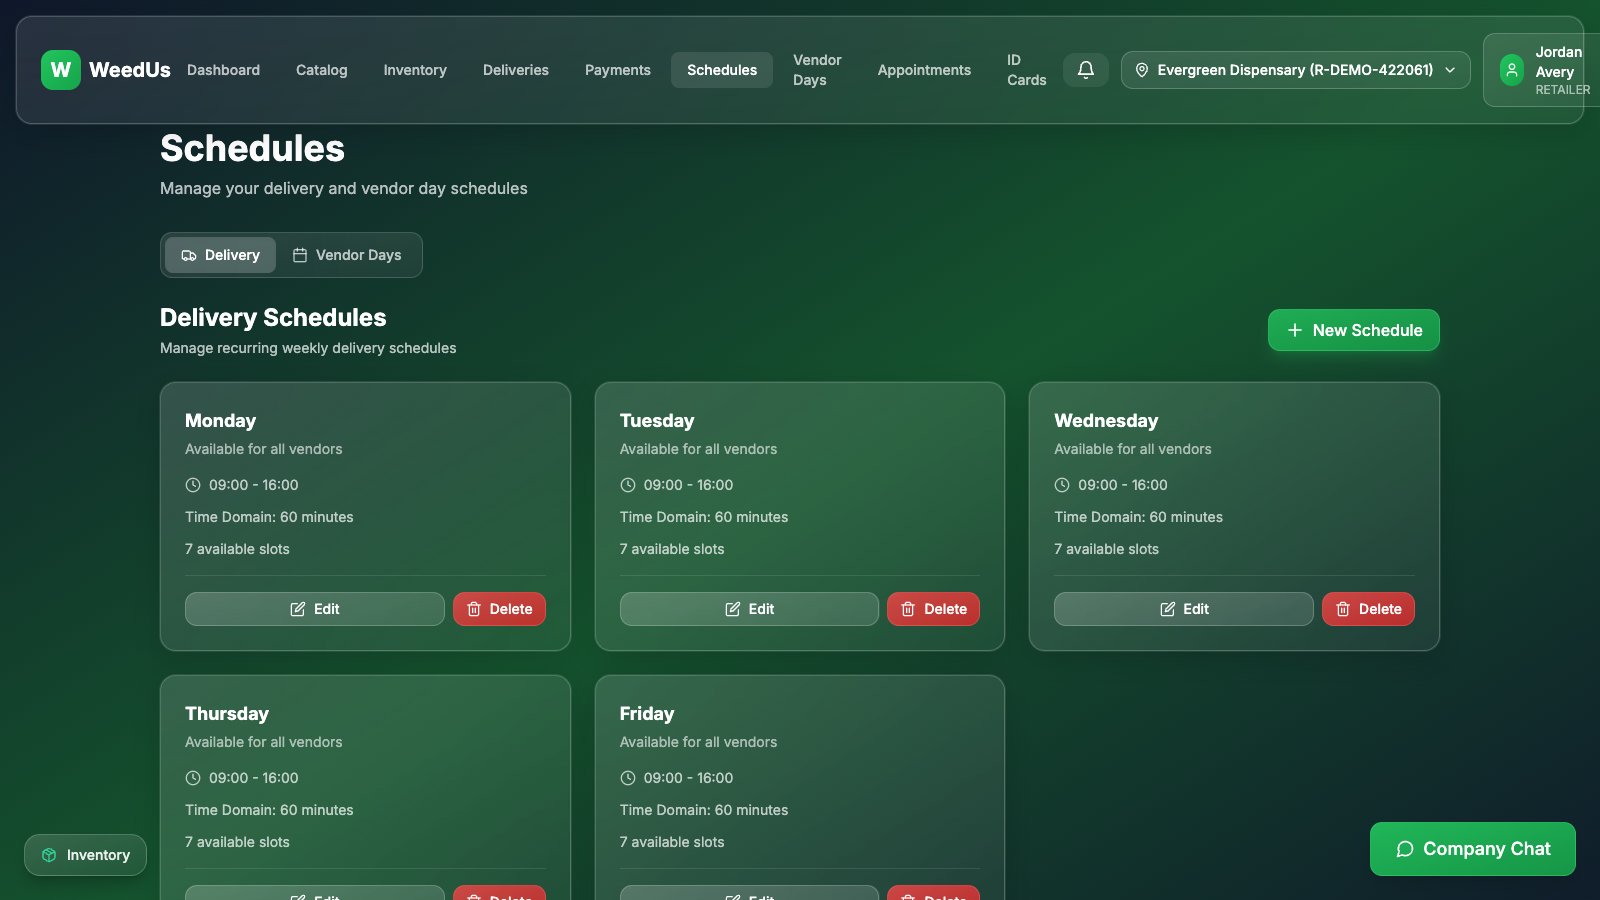
The Schedules page is where you tell vendors when your store accepts deliveries and when it hosts vendor days. Vendors can only book inside the windows you set here.
Delivery windows
- 1Open Schedules — the Delivery tab is first.
- 2Add a window for each weekday you accept deliveries (for example Mon–Fri, 9:00 AM – 4:00 PM) and choose the time-slot size (30 or 60 minutes).
- 3Vendors scheduling a delivery pick from exactly these slots.
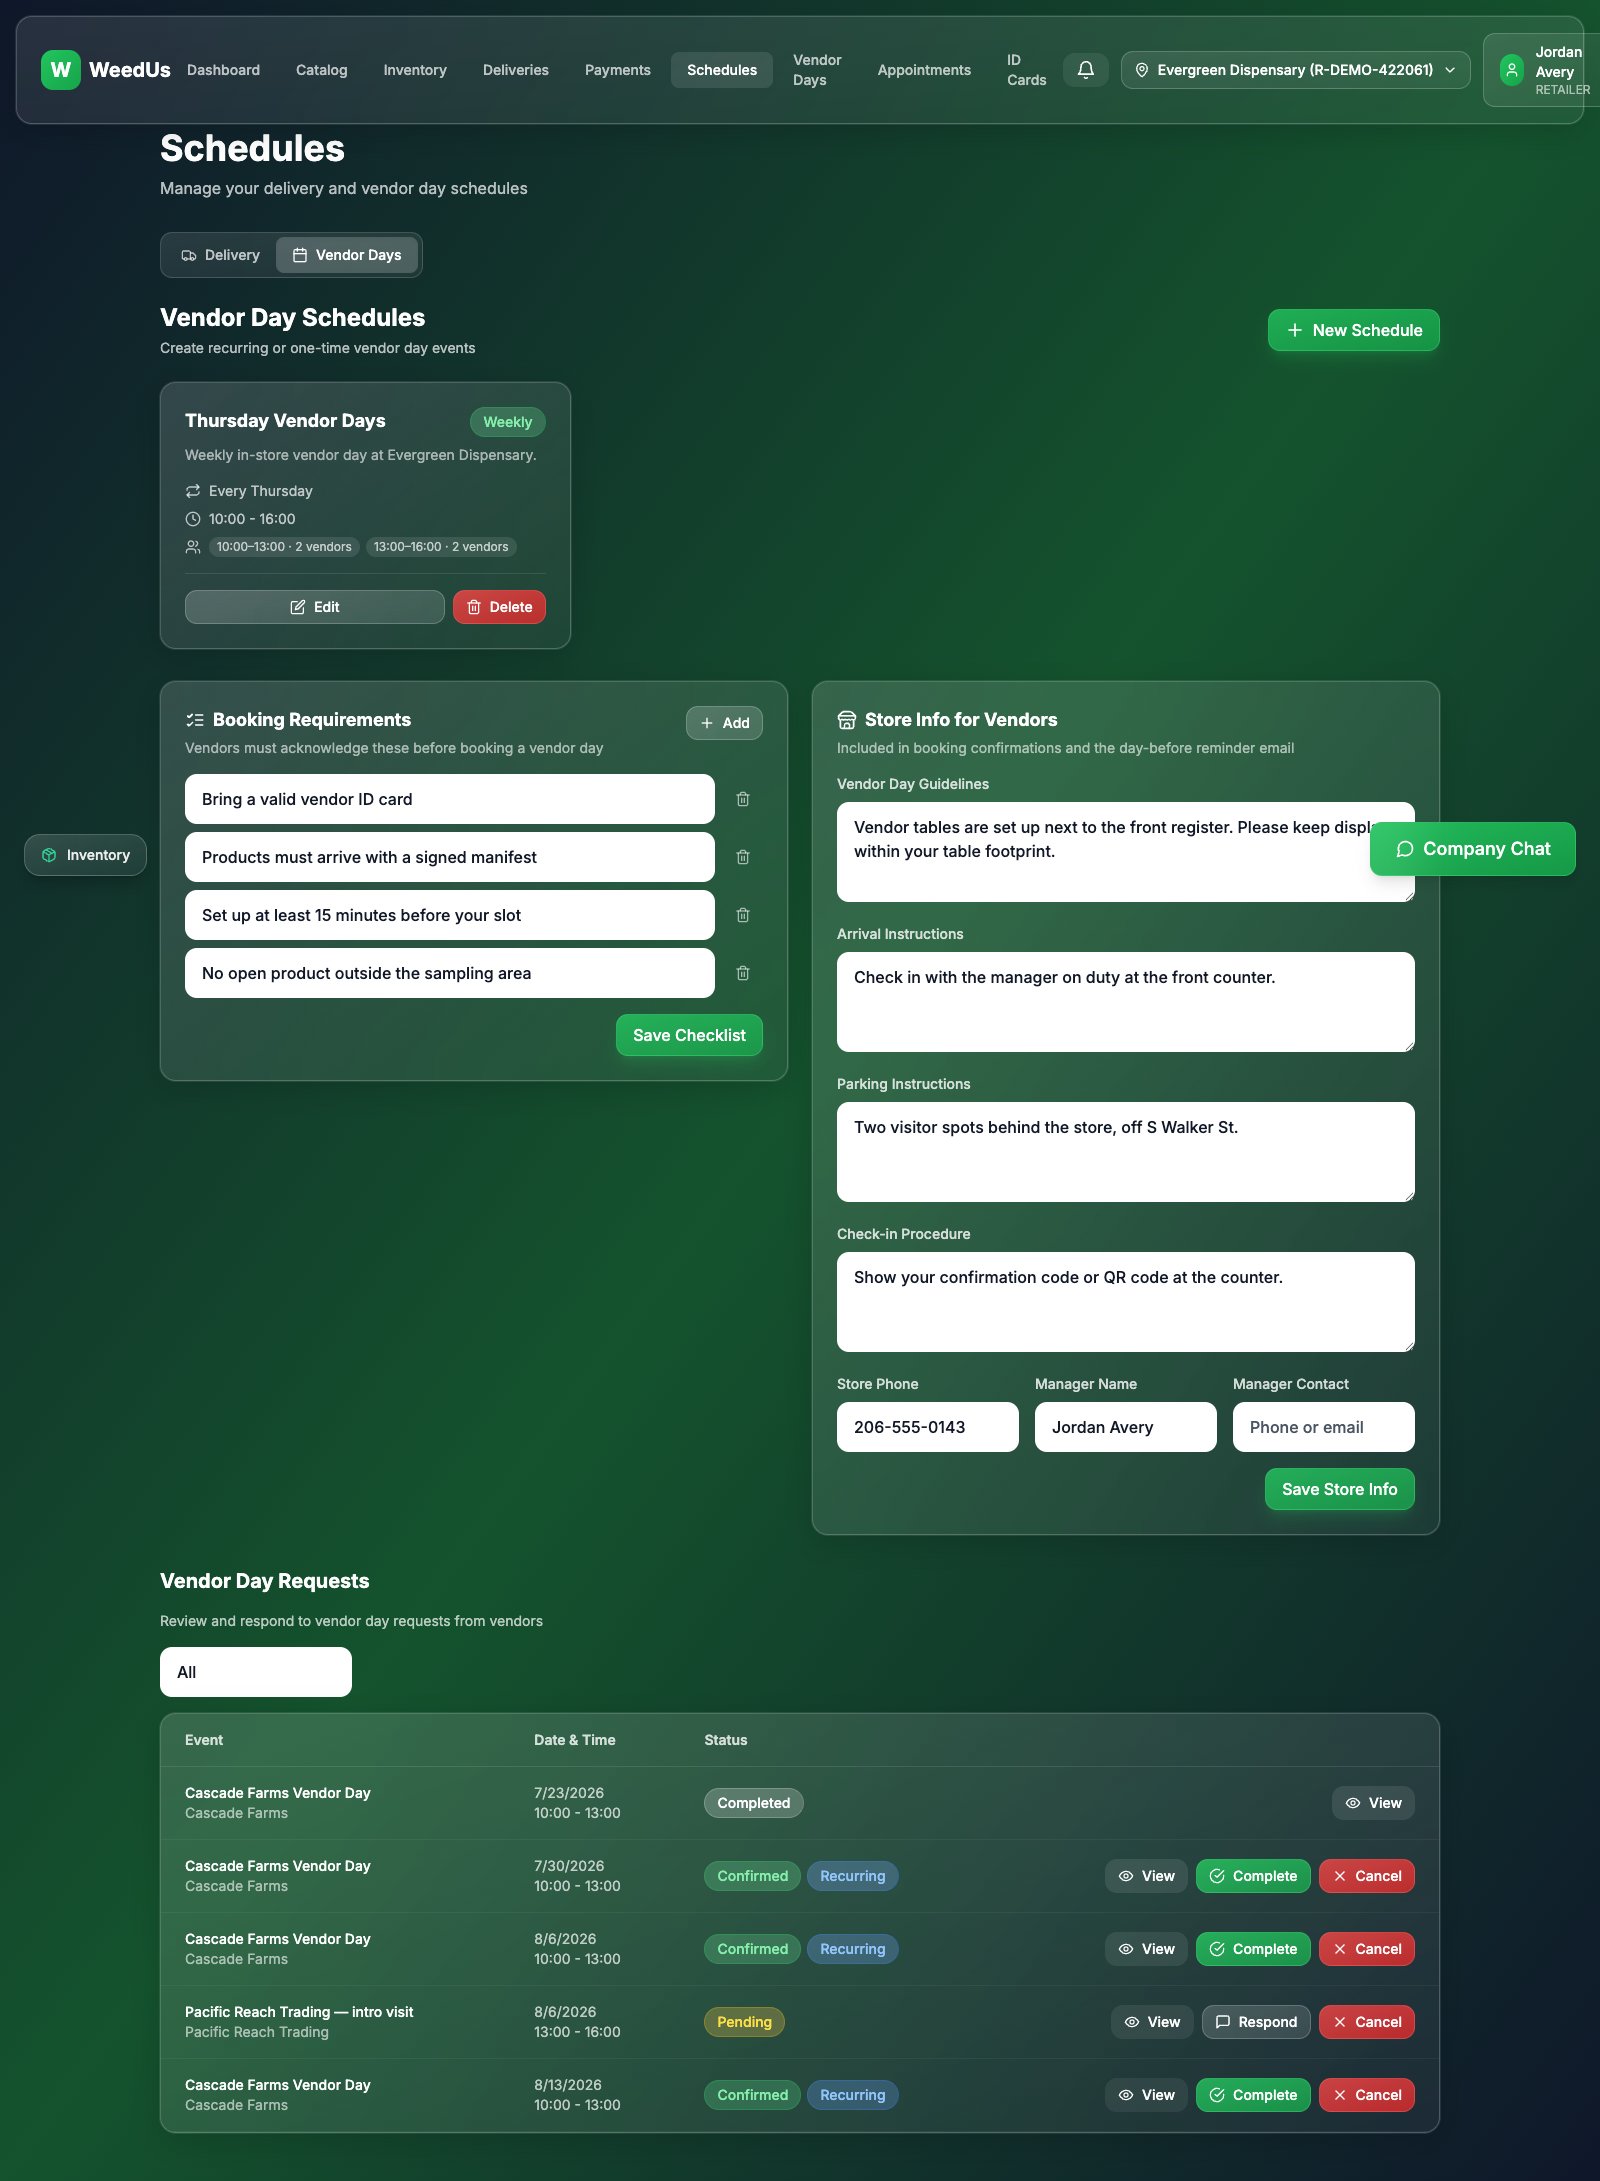
Vendor day setup
- 1Switch to the Vendor Days tab.
- 2Create a schedule (say, every Thursday) and split it into bookable time slots — each slot has its own vendor capacity, e.g. 10:00–1:00 and 1:00–4:00 with room for 2 vendors each.
- 3Edit the booking requirements checklist — the rules every vendor must acknowledge before booking (ID card, manifest, arrival time…).
- 4Fill in Store info for vendors: parking, arrival, and check-in instructions. These are sent automatically in booking confirmations and reminder emails.
- 5Requests for dates outside your schedule appear in the request list here — approve, suggest a change, or decline.
10.Receiving deliveries
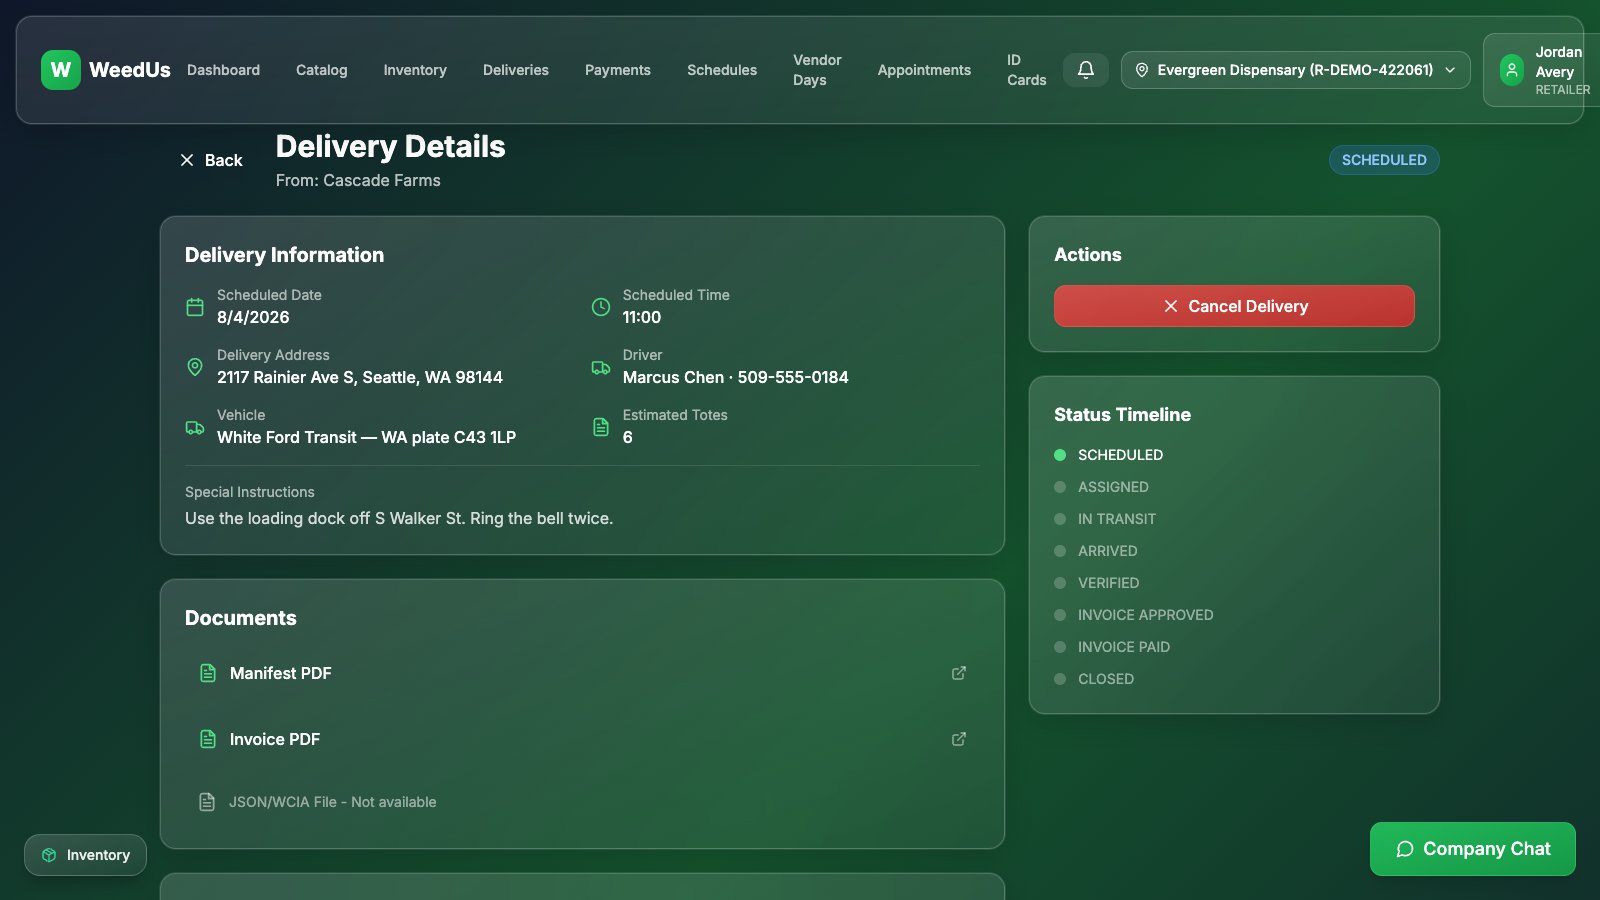
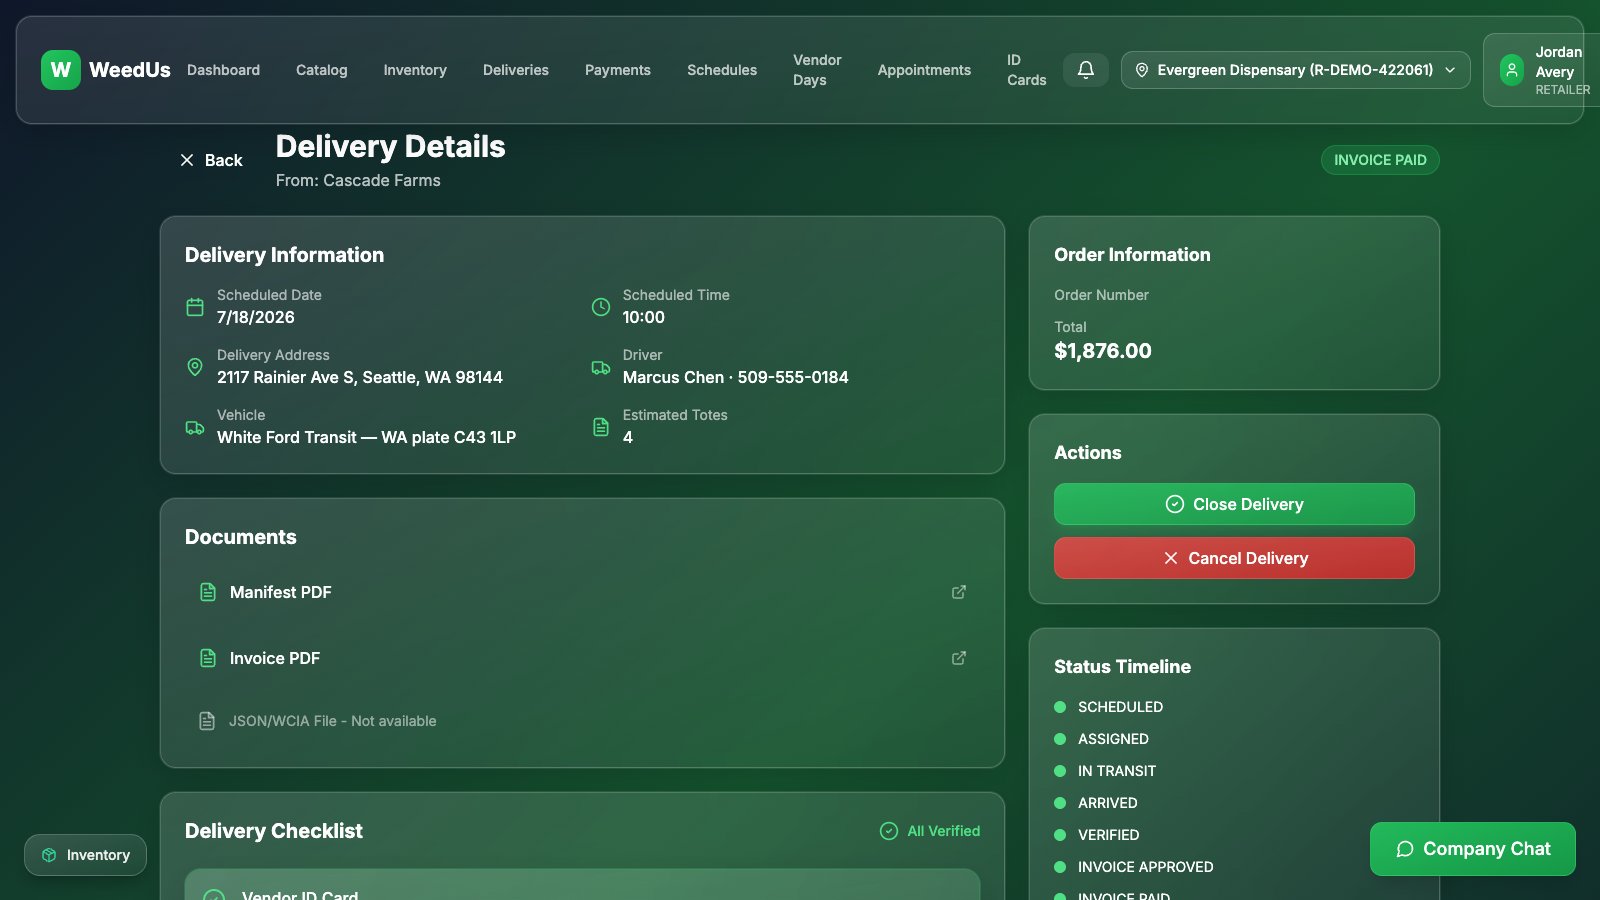
Vendors schedule deliveries into your windows and attach their paperwork (manifest, invoice, and product data). Your job on delivery day is to verify and close.
- 1Open Deliveries to see what's coming. Each entry shows the vendor, date, time slot, driver, and attached documents.
- 2Click a delivery to open it. Review the manifest and invoice PDFs, and check the driver's vendor ID card at the door (section 13).
- 3Work through the receiving checklist: ID verified, manifest verified, items verified, invoice verified — tick each as you go.
- 4Press Approve Invoice when the paperwork matches what arrived. Record the payment (check number, ACH reference, or card) when you pay it.
- 5Press Close Delivery. WeedUs then matches the delivered items to your POSaBIT inventory so stock stays in sync.
11.Vendor days
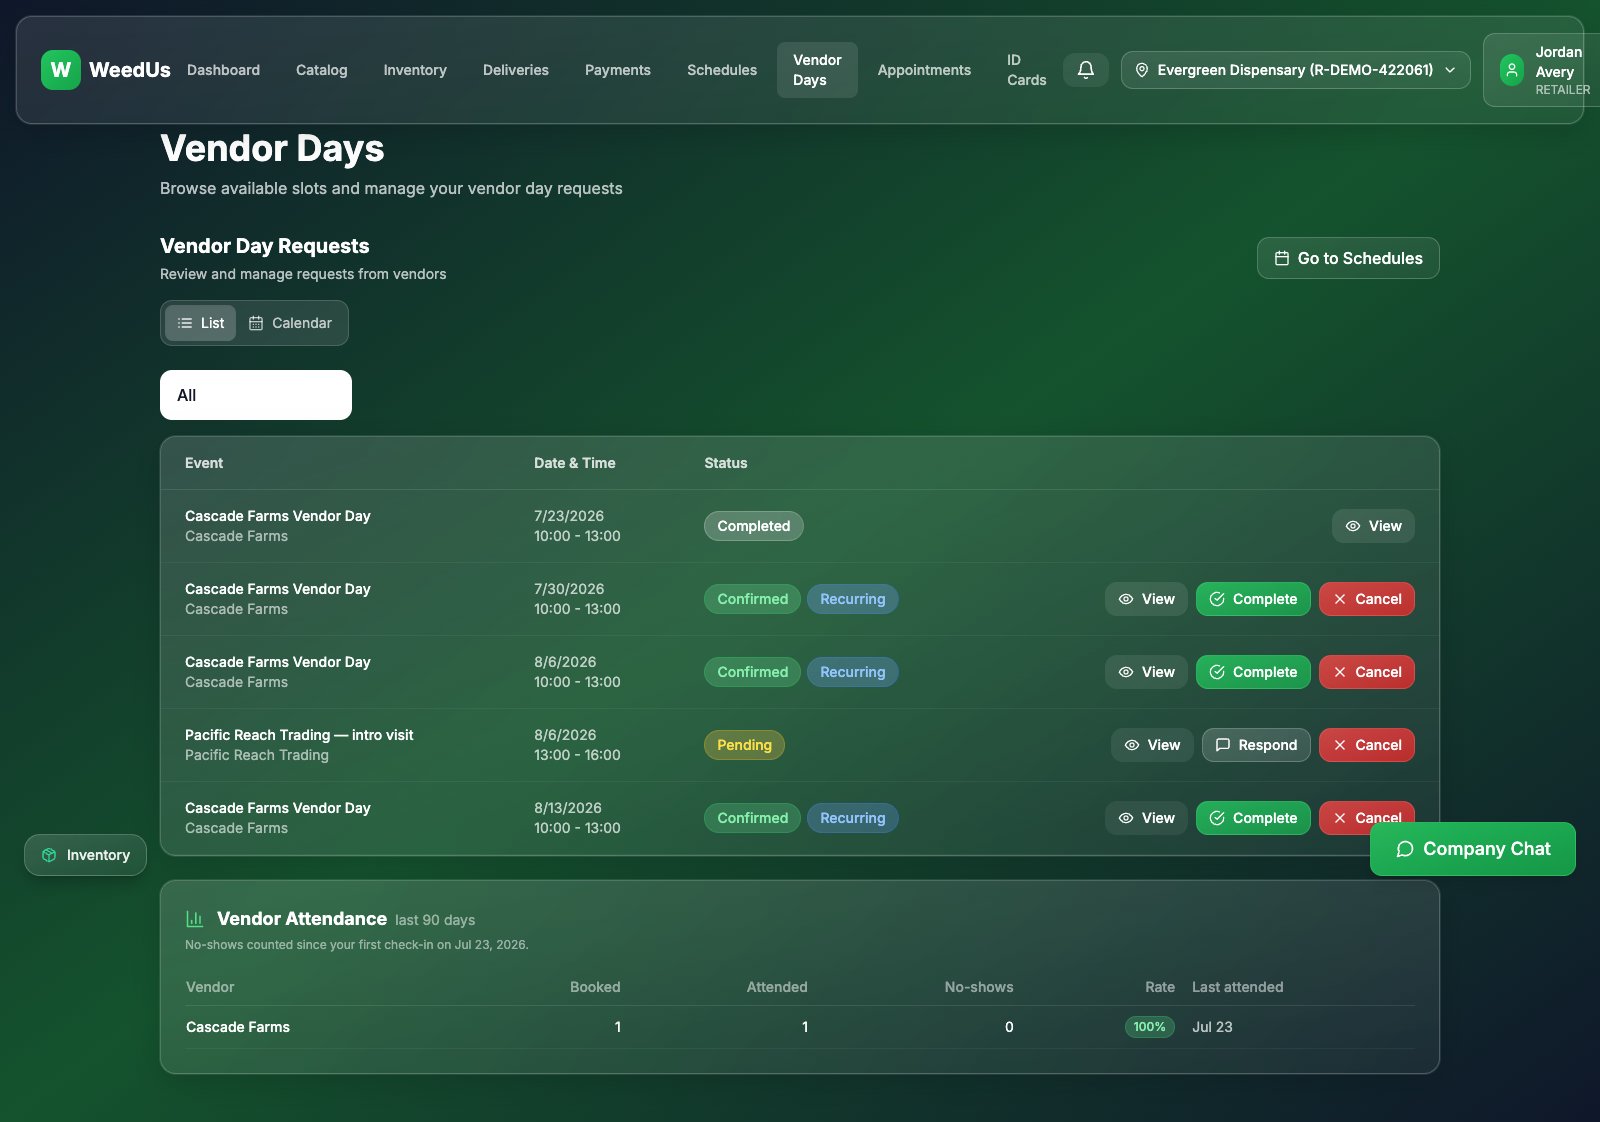
Vendor days are in-store events where a vendor's rep meets your customers. Once your schedule is set up (section 9), vendors book themselves in — you watch it all from the Vendor Days page.
- 1Open Vendor Days. The list (or calendar view) shows every booked and requested day, including each booking's promotion details — brands, discounts, and giveaways the vendor is planning.
- 2On the day, the vendor's rep shows a QR code or confirmation number (like
VD-8K2M-P4XN). Open the booking and press Check In Vendor — type the code to verify it, or check them in manually. - 3The Vendor Attendance card at the bottom tracks each vendor's history: booked vs. attended vs. no-shows, so you know who actually turns up.
Sync to Calendar pushes vendor days and deliveries into your Google Calendar — set it up once in Settings → Calendar Sync.
12.Appointments
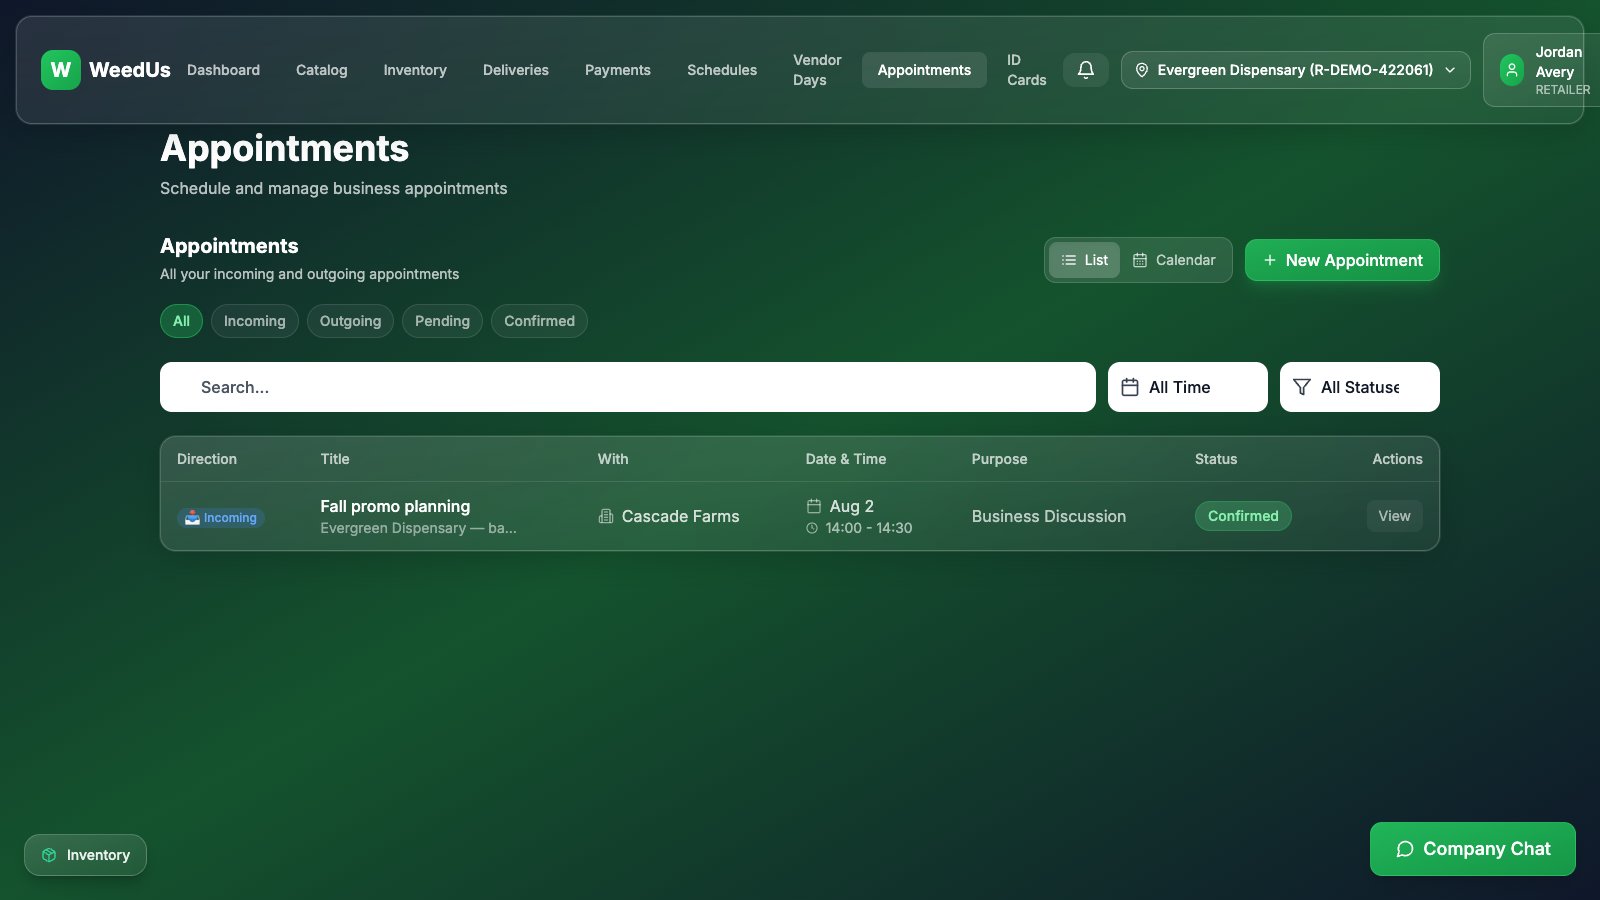
Appointments are one-on-one business meetings (not in-store events) — a vendor rep asking for 30 minutes to present a new line, for example.
- 1Open Appointments. Requests from vendors appear with a proposed date, time, and purpose.
- 2Confirm, suggest a new time, or decline. You can also create your own appointment request to a vendor.
13.Vendor ID cards
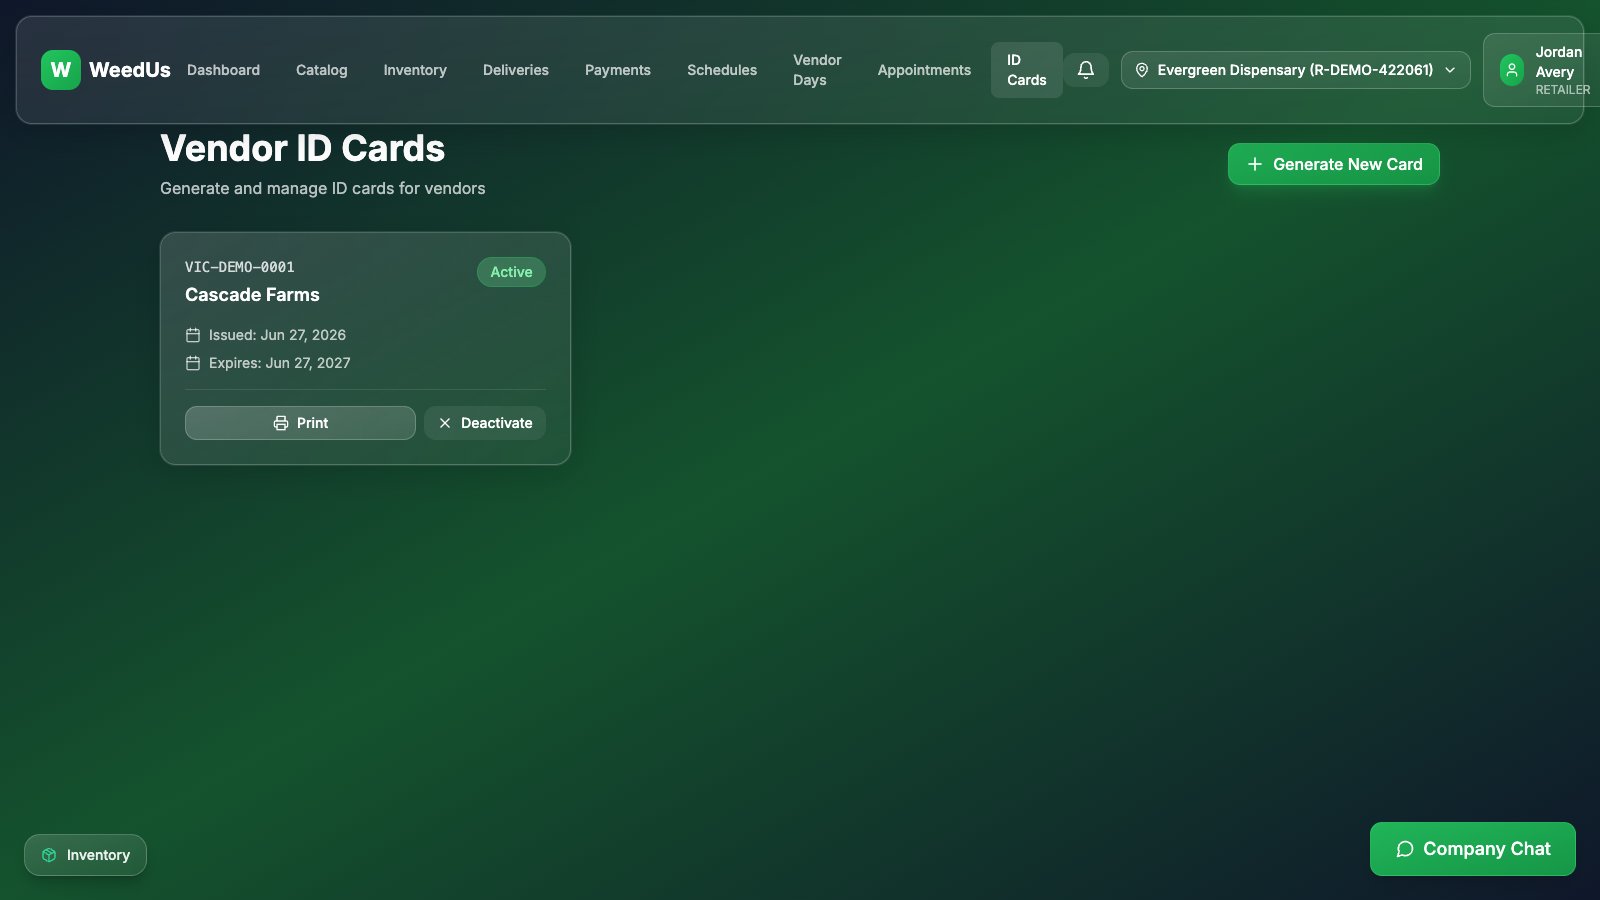
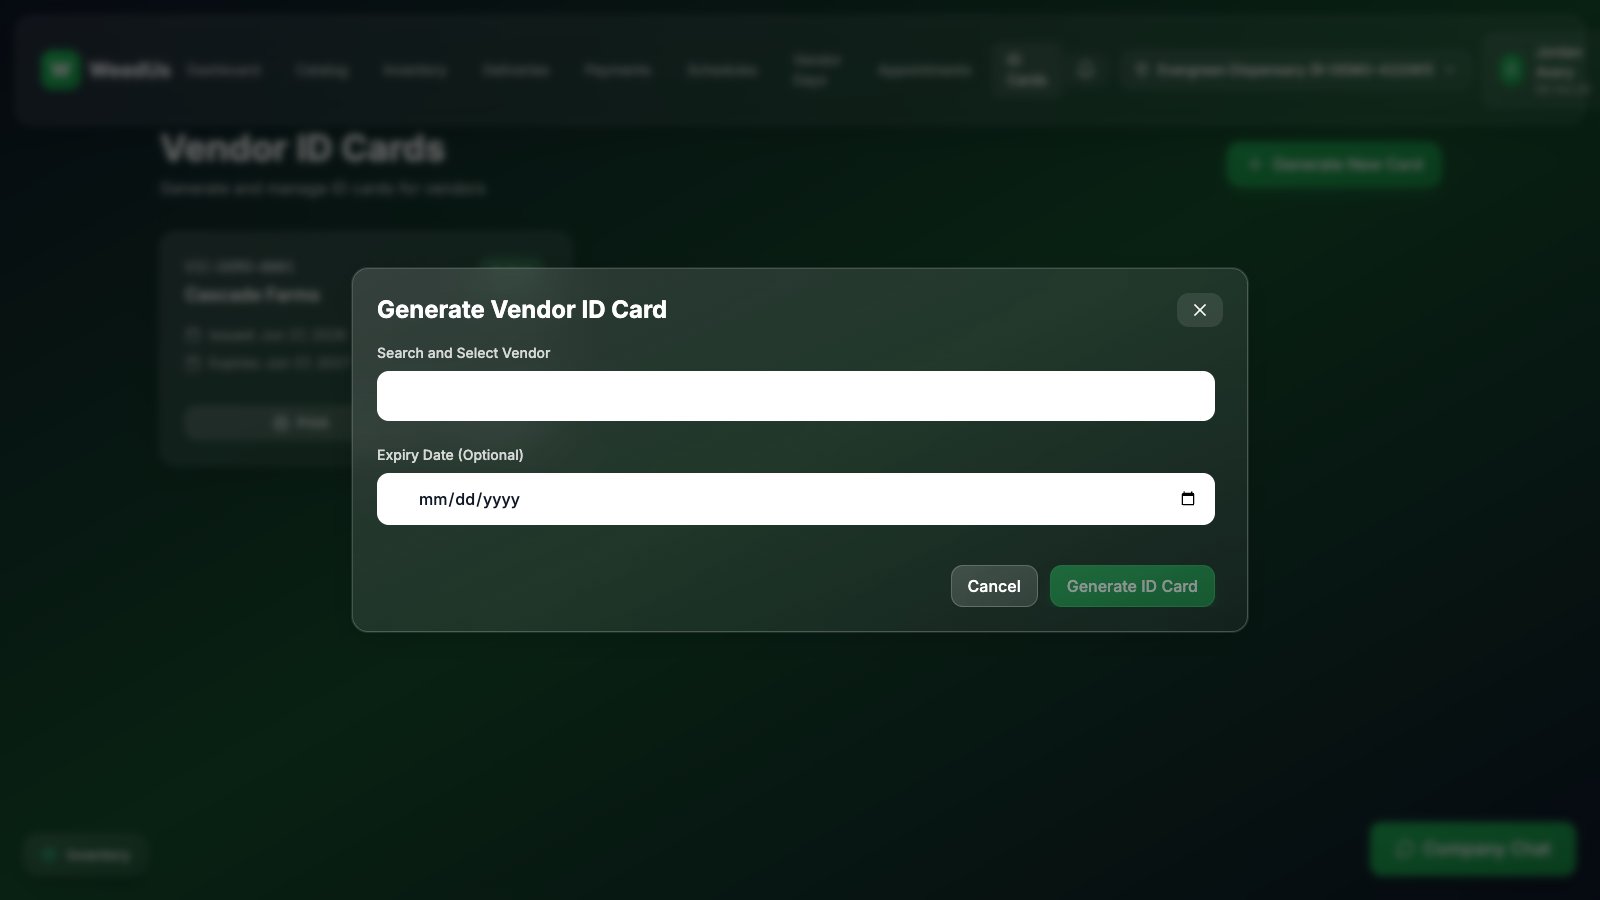
A vendor ID card is a badge you issue to a vendor who works with your store. It carries their license info and a QR code, so whoever shows up at your door — for a delivery or vendor day — can be verified in seconds.
- 1Open ID Cards and press Generate New Card.
- 2Search for the vendor, optionally set an expiry date, and press Generate ID Card.
- 3Press Print to hand them a physical copy — the vendor also sees the card digitally in their own account.
- 4If a relationship ends, Deactivate the card (you can reactivate it later, or delete it entirely).
14.Inbox & chat
Two ways to talk to your vendors, both under your account:
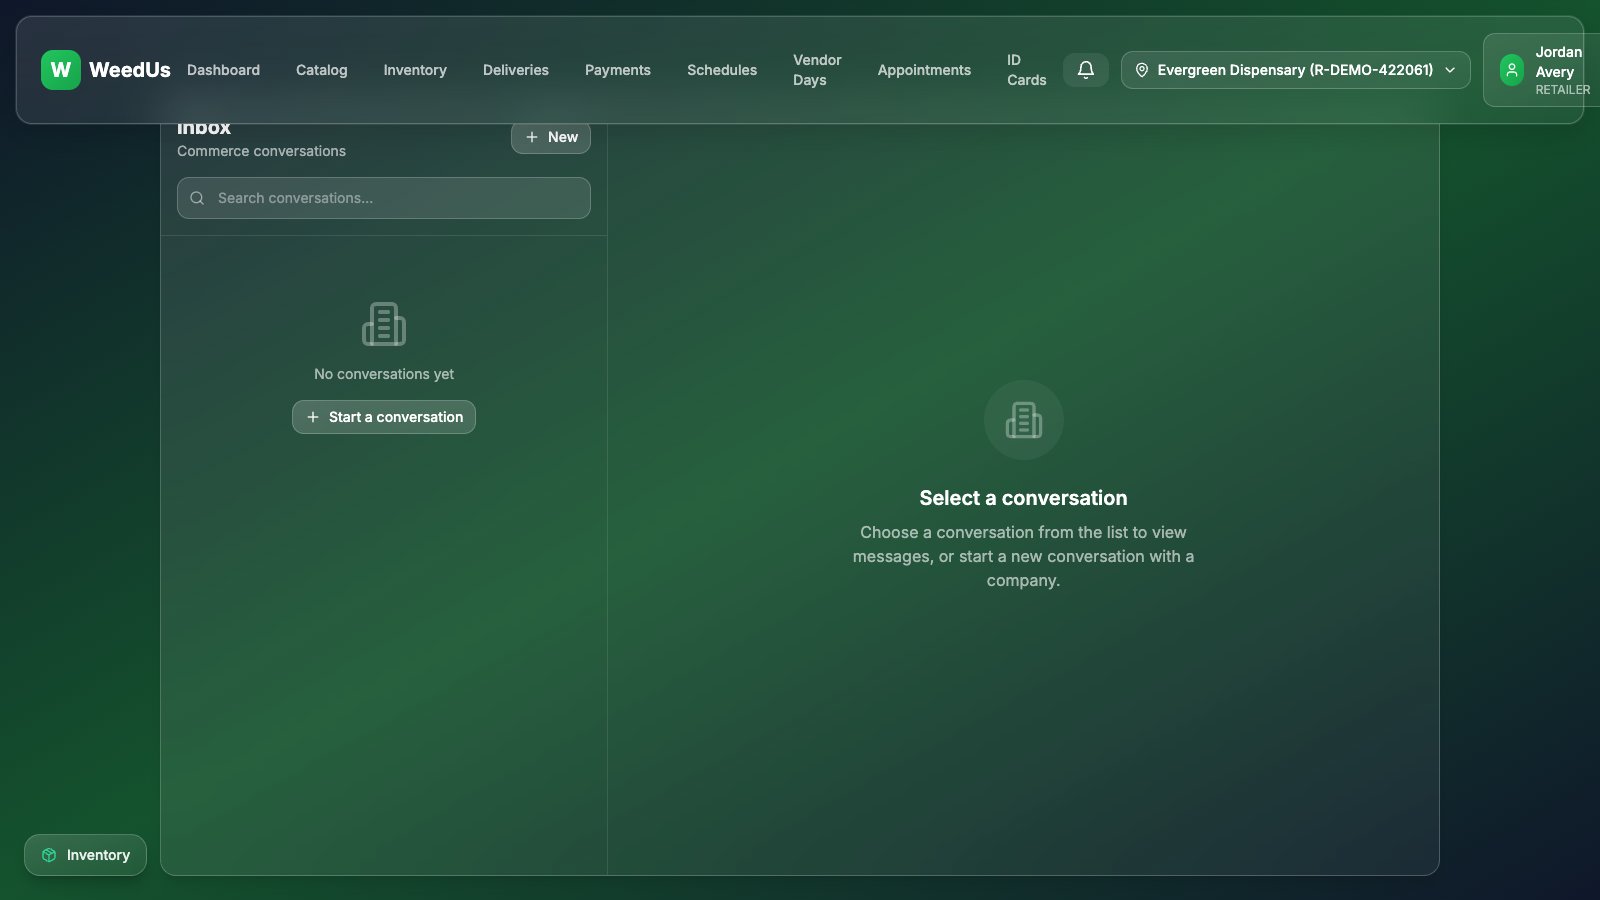
- Inbox (top menu) — full conversations organized by topic (pricing, orders, deliveries…). Start a new conversation with New Conversation, search old ones, and pick up any thread where you left off.
- Company Chat — the floating green button in the corner of every page. Same conversations, always one click away.
15.Locations & team roles
Multiple stores
If you run more than one store, each location lives under one login. The location selector in the top bar shows which store you're working as — every page (catalog, orders, inventory, schedules…) shows that store's data.
- 1Click the location name in the top bar to switch stores.
- 2Press Manage Locations in the same menu to add a store (name, address, and its own license number), edit details, or set the default.
Team roles
| Role | What they can do |
|---|---|
| Owner | Everything — including business settings, billing, and locations. |
| Manager | Day-to-day operations: orders, deliveries, schedules, ID cards, locations. |
| Bartender | View-only on most pages — can look up inventory and deliveries, but not send orders or change settings. |
16.Profile & settings
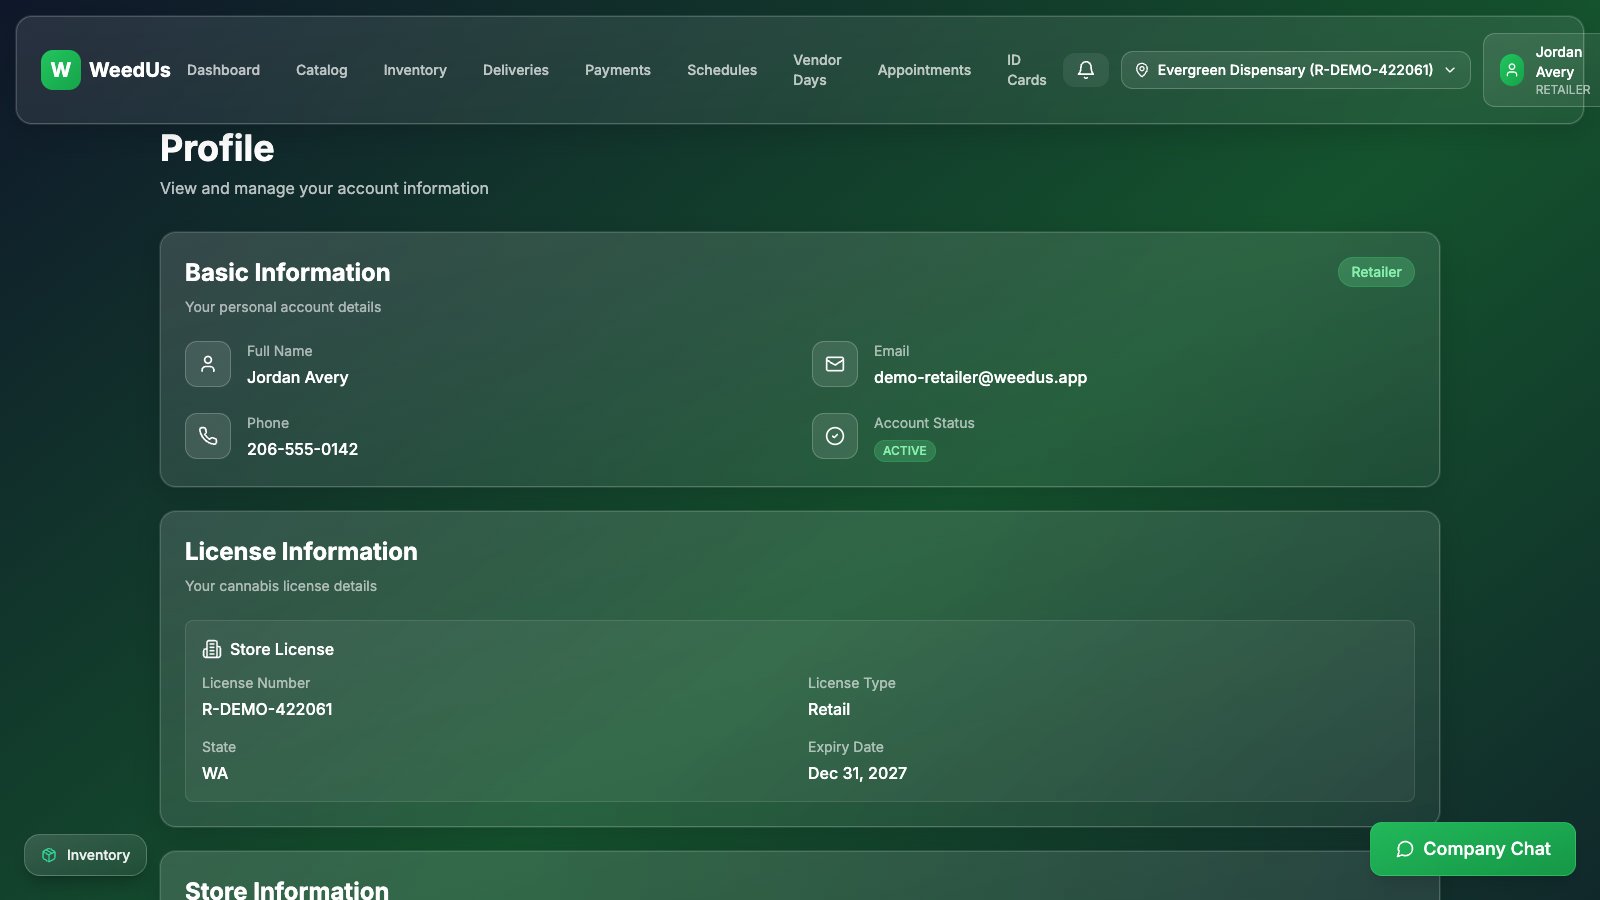
- Profile (profile menu) — a read-only summary of your account and the current store's license info.
- Settings — where you actually edit things: personal info, store info, password, POSaBIT connection, and Google Calendar sync.
- Changing your license number requires an admin review — request it from the Danger Zone at the bottom of Settings.
17.Notifications, feedback & help
- The bell in the top bar collects everything that needs your attention: new orders, scheduled deliveries, vendor day bookings, messages, and payments. Unread items show a green badge — press Mark all read to clear them.
- Found a bug or have an idea? Open your profile menu and press Feedback — it goes straight to the WeedUs team.
- This guide (and the vendor and out-of-state guides) live inside the app too: profile menu → Help & Guides.